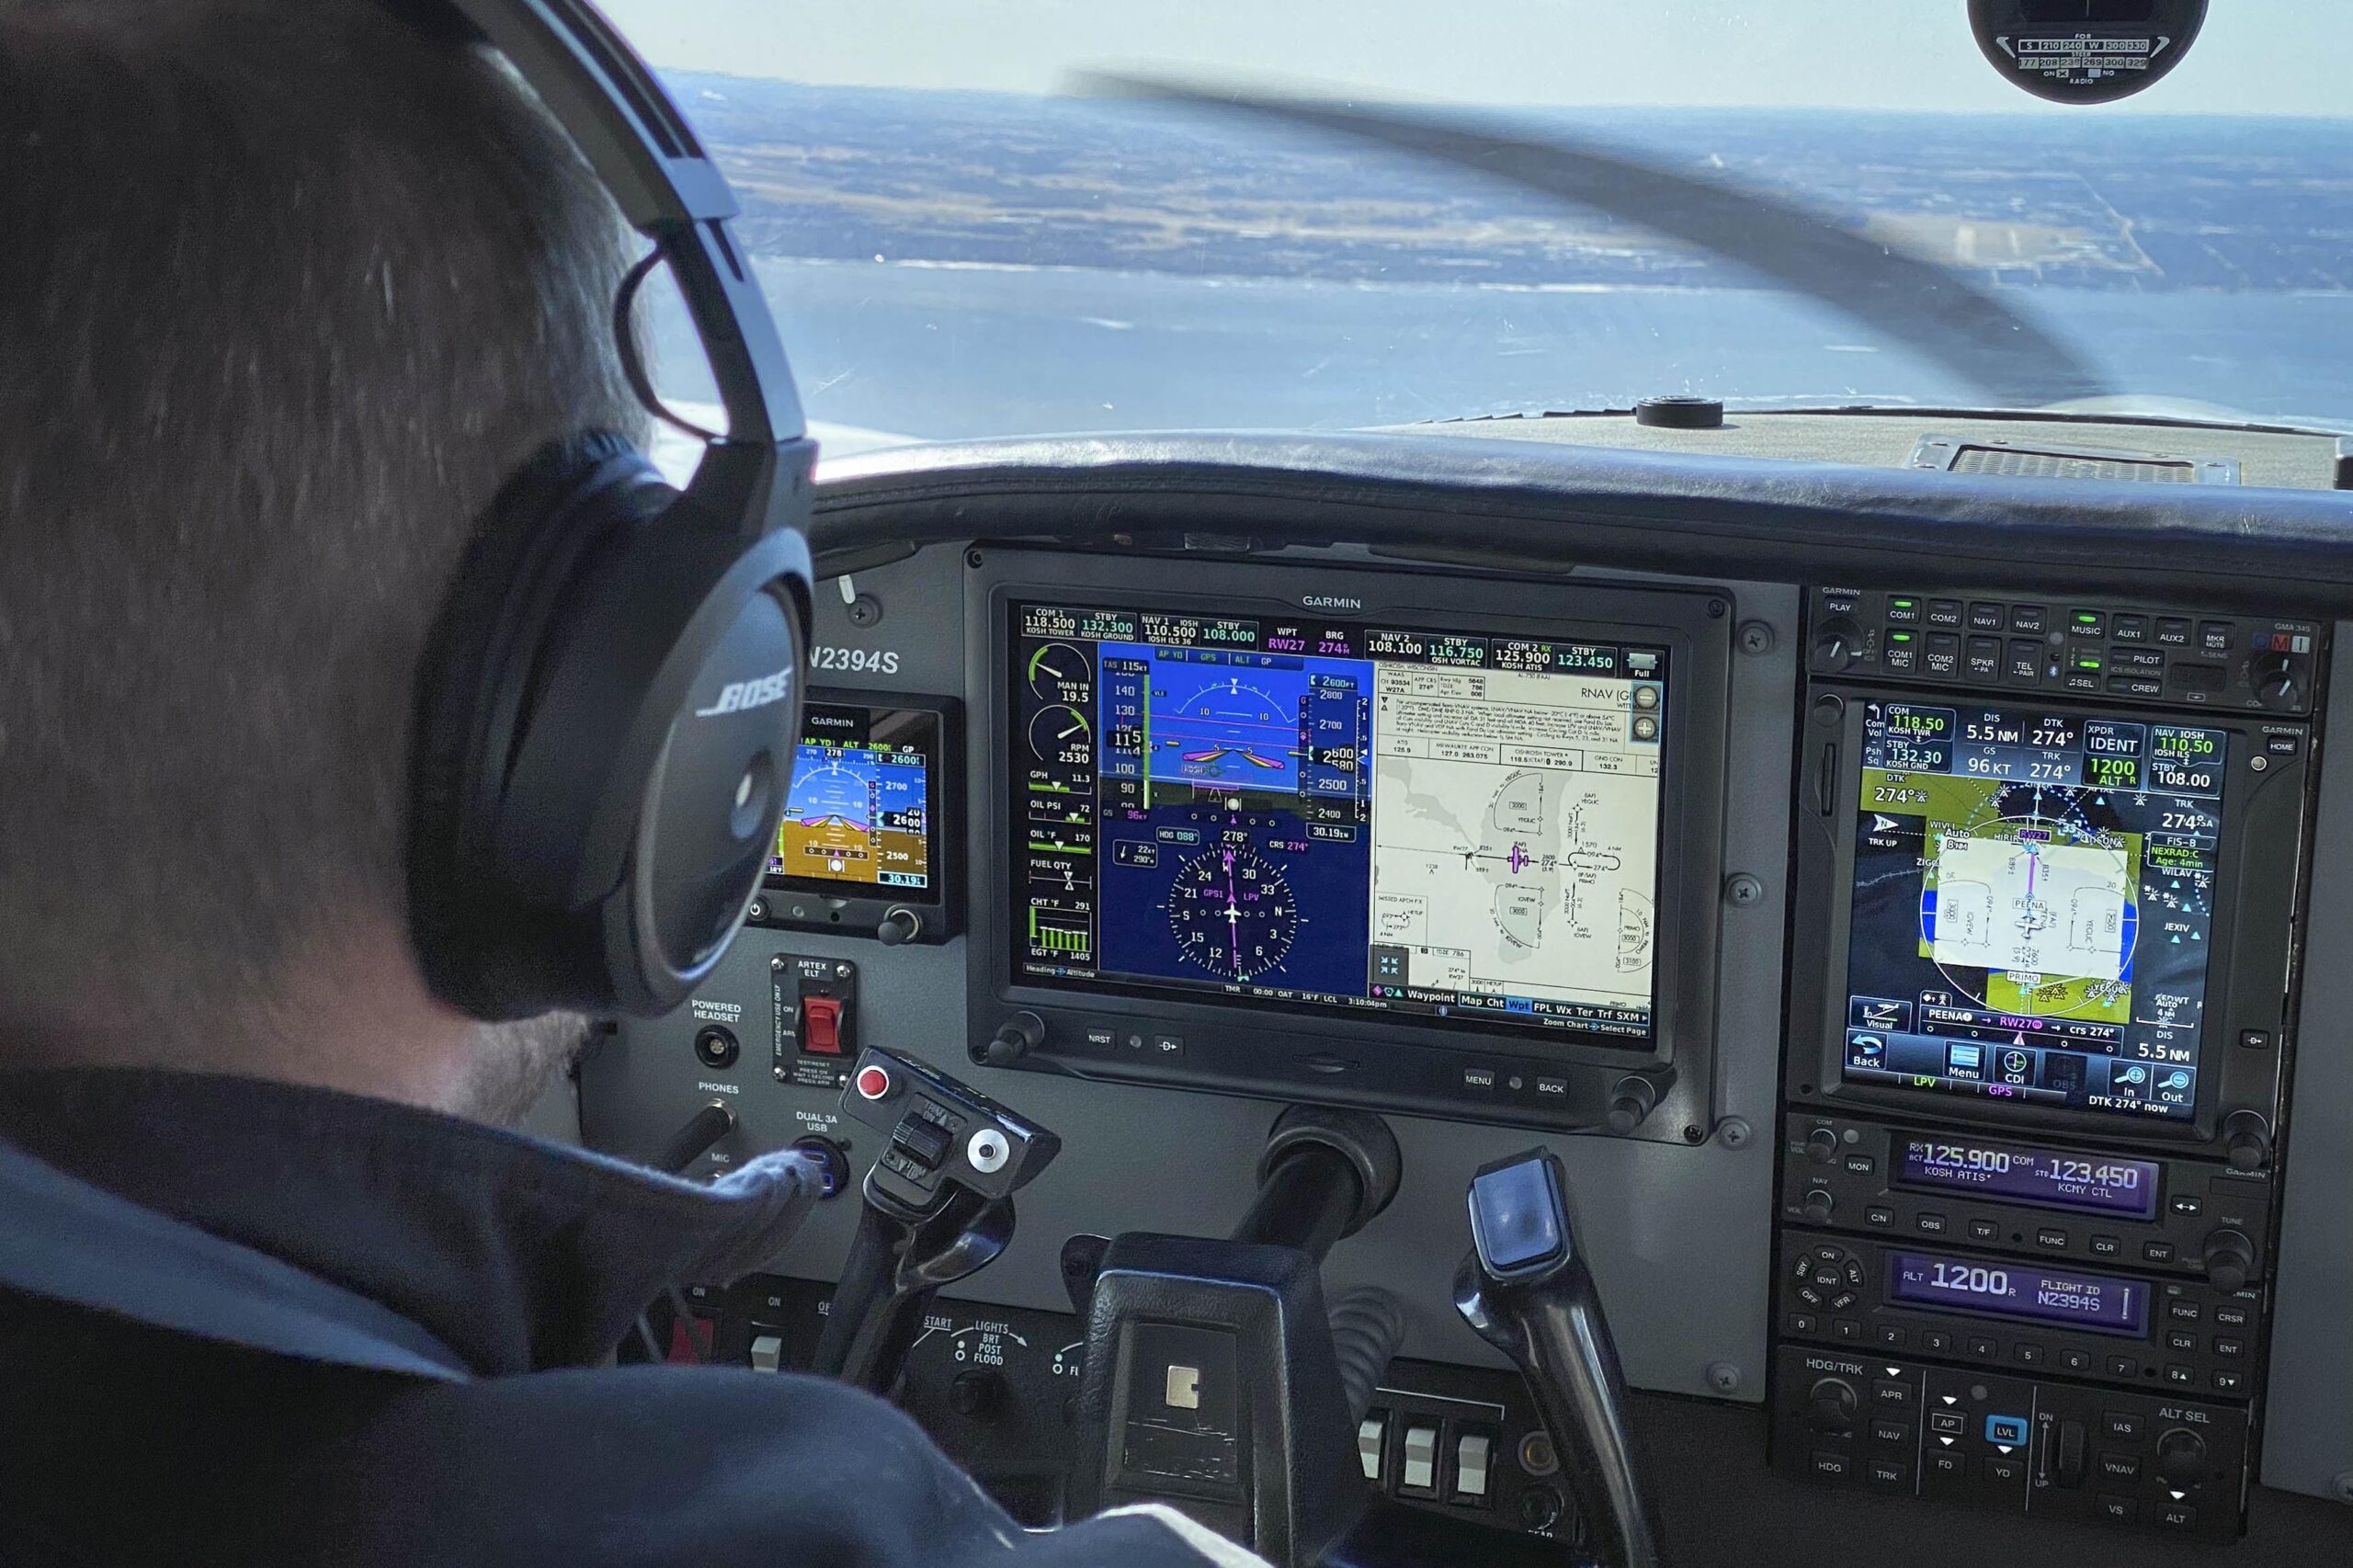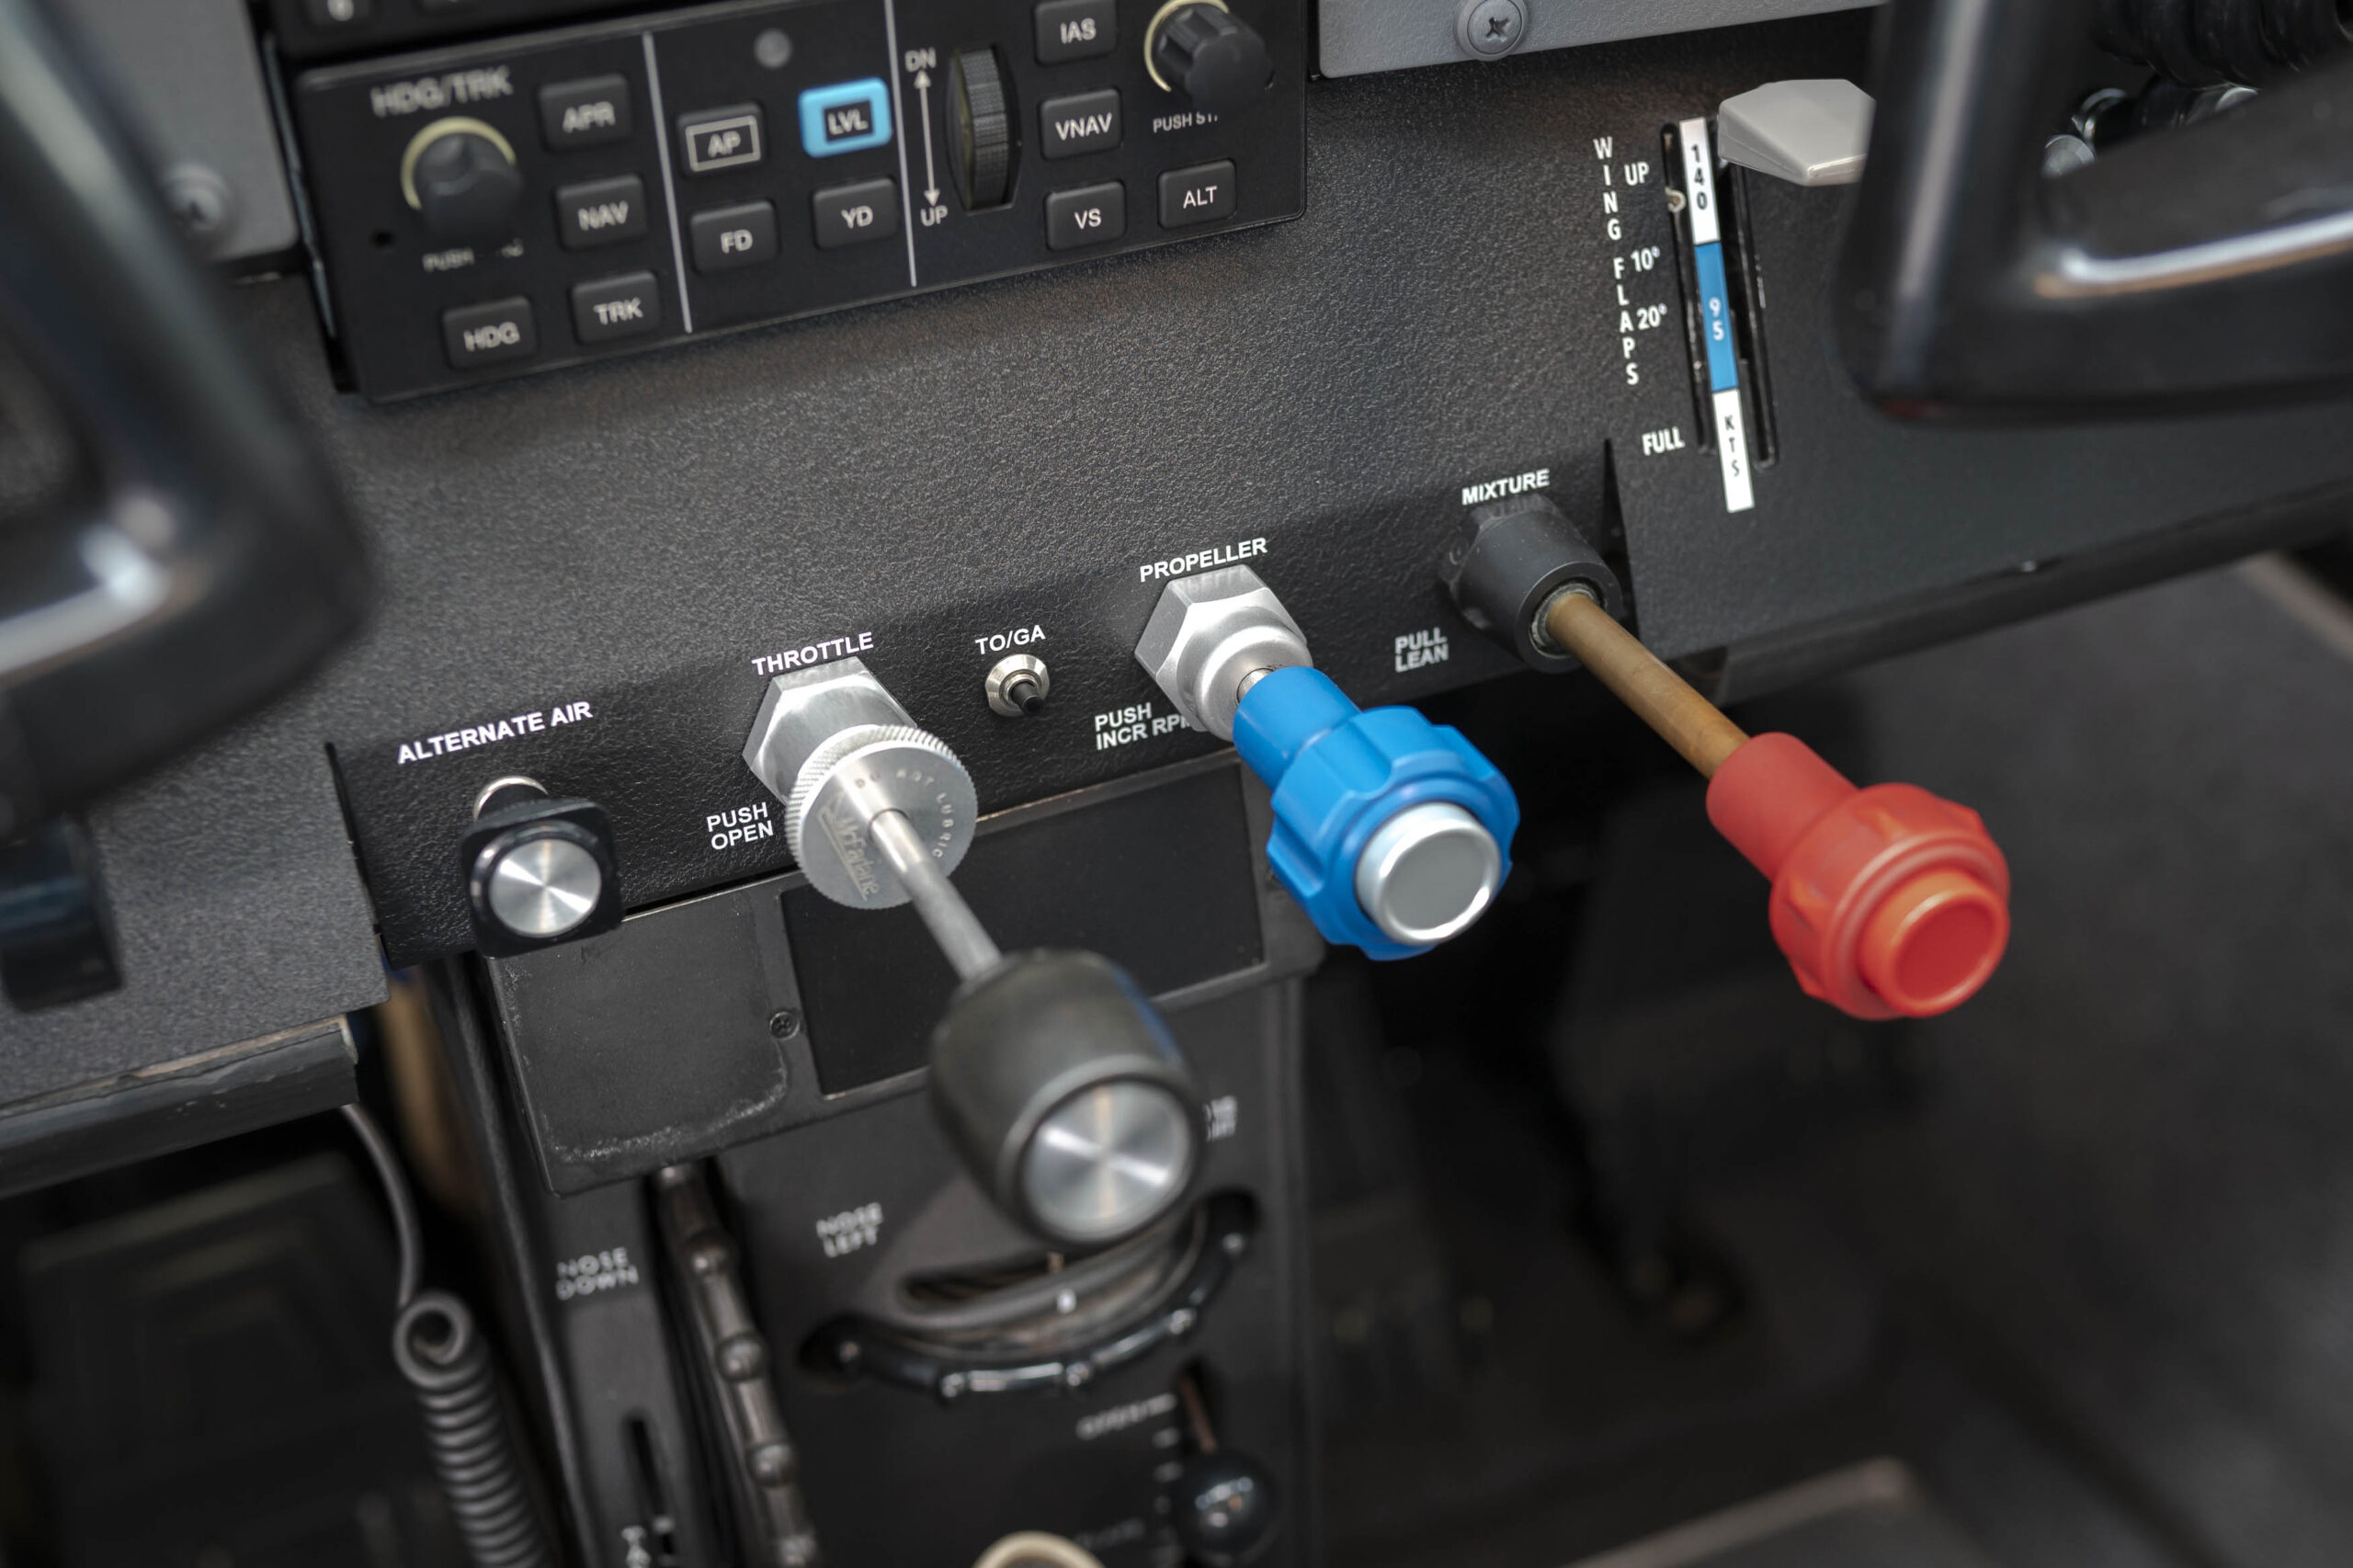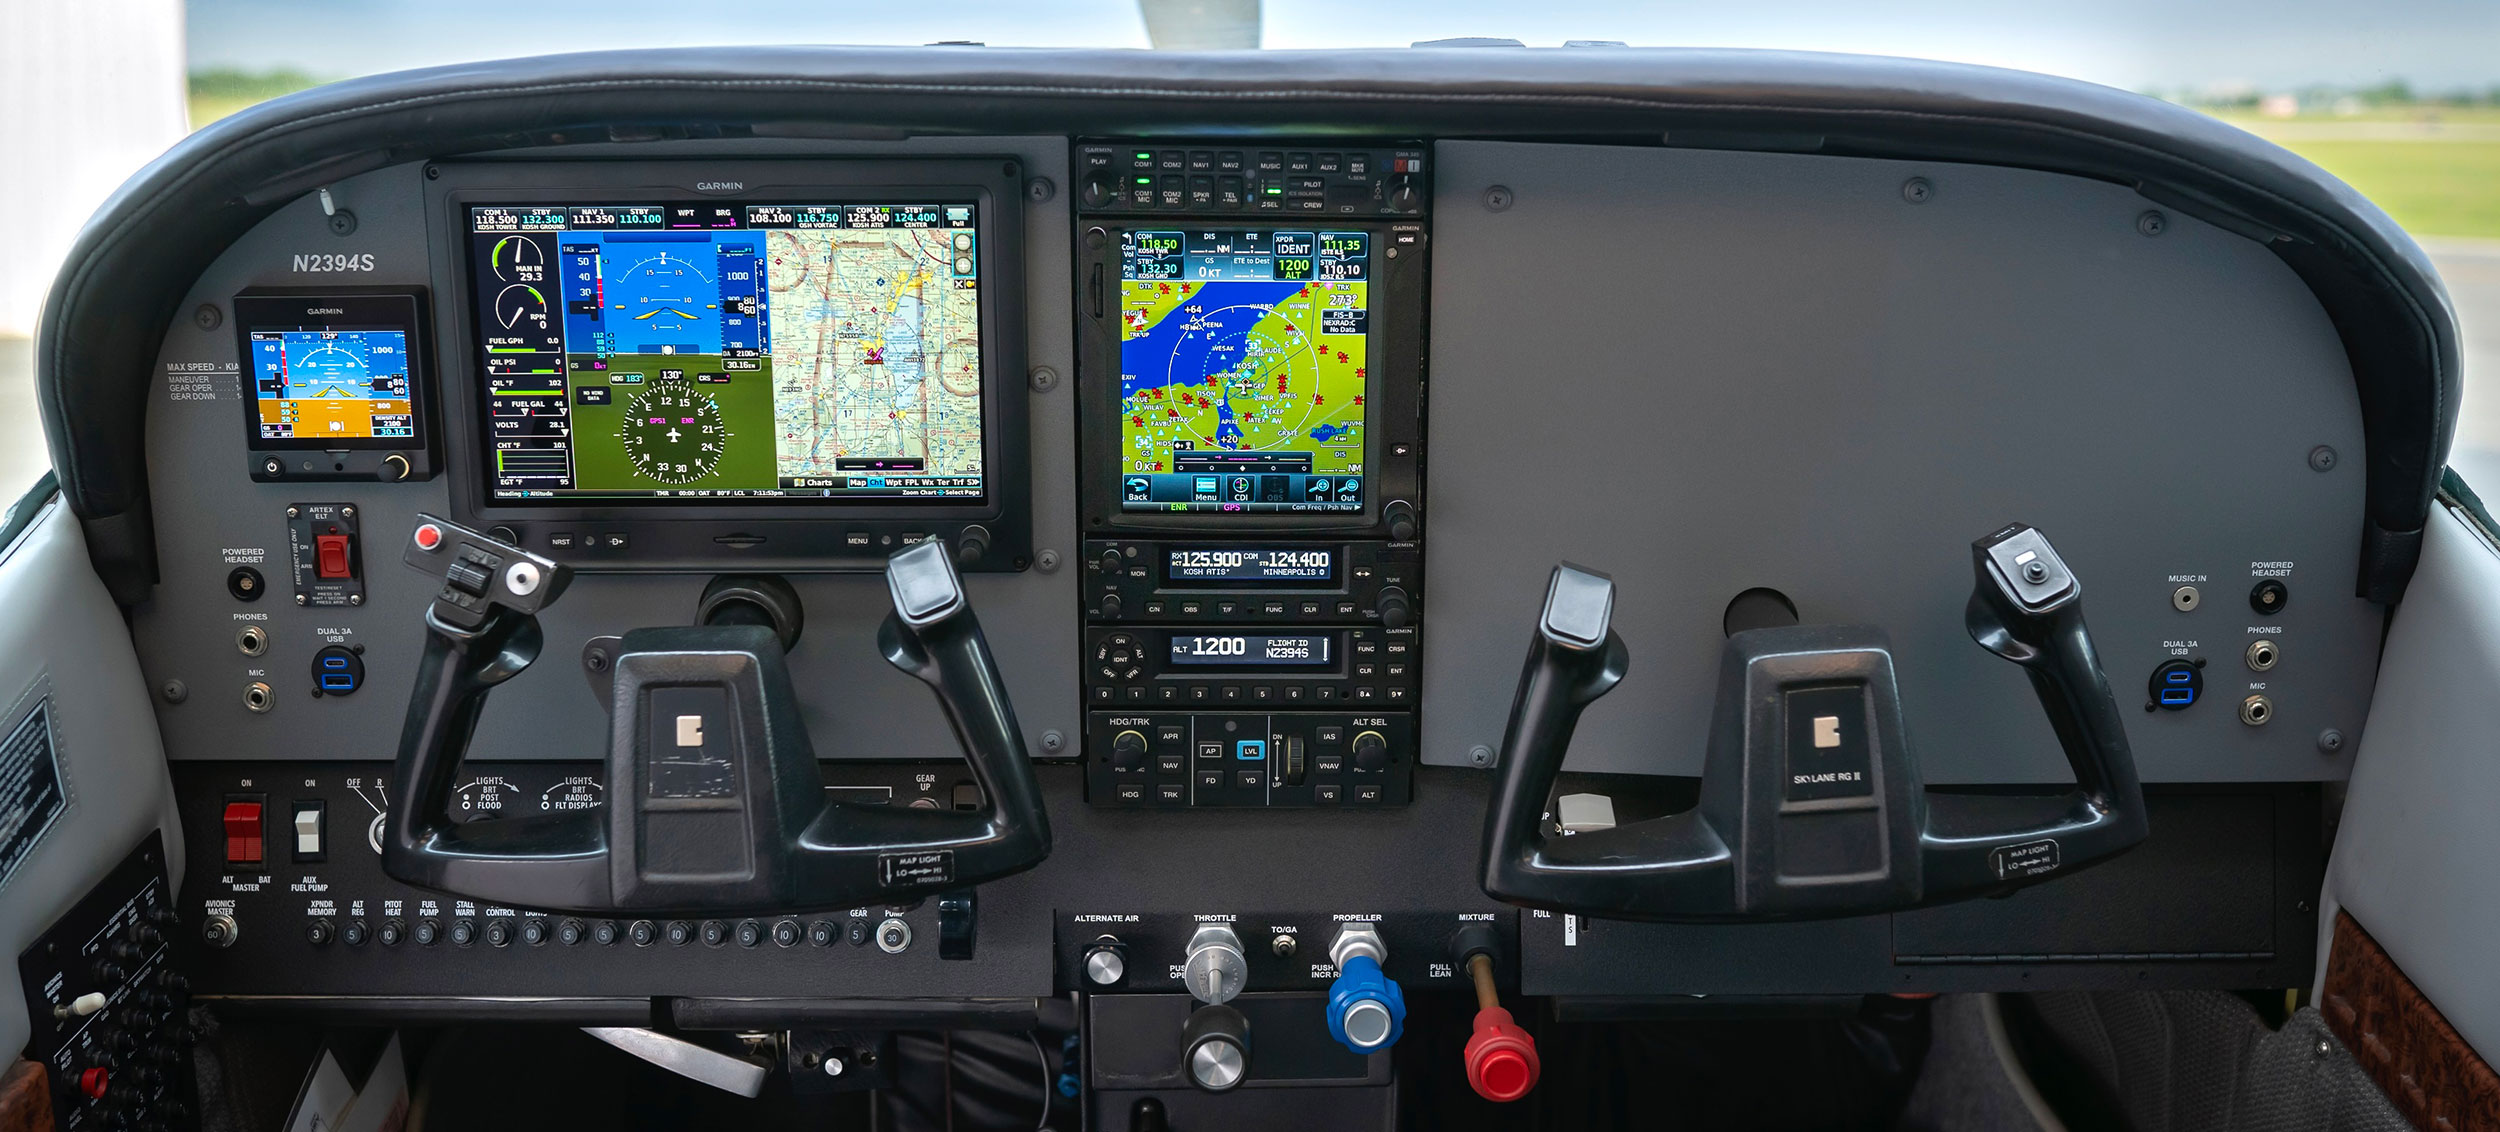
This 1979 Cessna R182 instrument panel received a major face lift with a factory-fresh modern avionics suite from NewView of Oshkosh, WI.
This particular Cessna R182, commonly referred to as a 182RG, arrived at our facility packed full of 1980s era Bendix King avionics equipment. At the time this type of avionics configuration was top of the line. While much of this original equipment is still in use and serviceable in many aircraft flying today, in the case of this aircraft it was time to bring the airframe into the modern era with the latest technology offerings from Garmin.
The aircraft provided some added challenges due to the amount of redundant avionics systems that were present, resulting from its time as a law enforcement aircraft. It’s not every day that you see two audio panels, 4 com antennas, and a plethora of ports and connections in the rear passenger arm rests for equipment that had since been removed. The aircraft came equipped with a Bendix King KFC 200 autopilot, driven by a KI 256 attitude indicator and a KI 525 HSI. The customer stated the autopilot had been giving them problems, and we decided it was time to go digital! Easy right?…
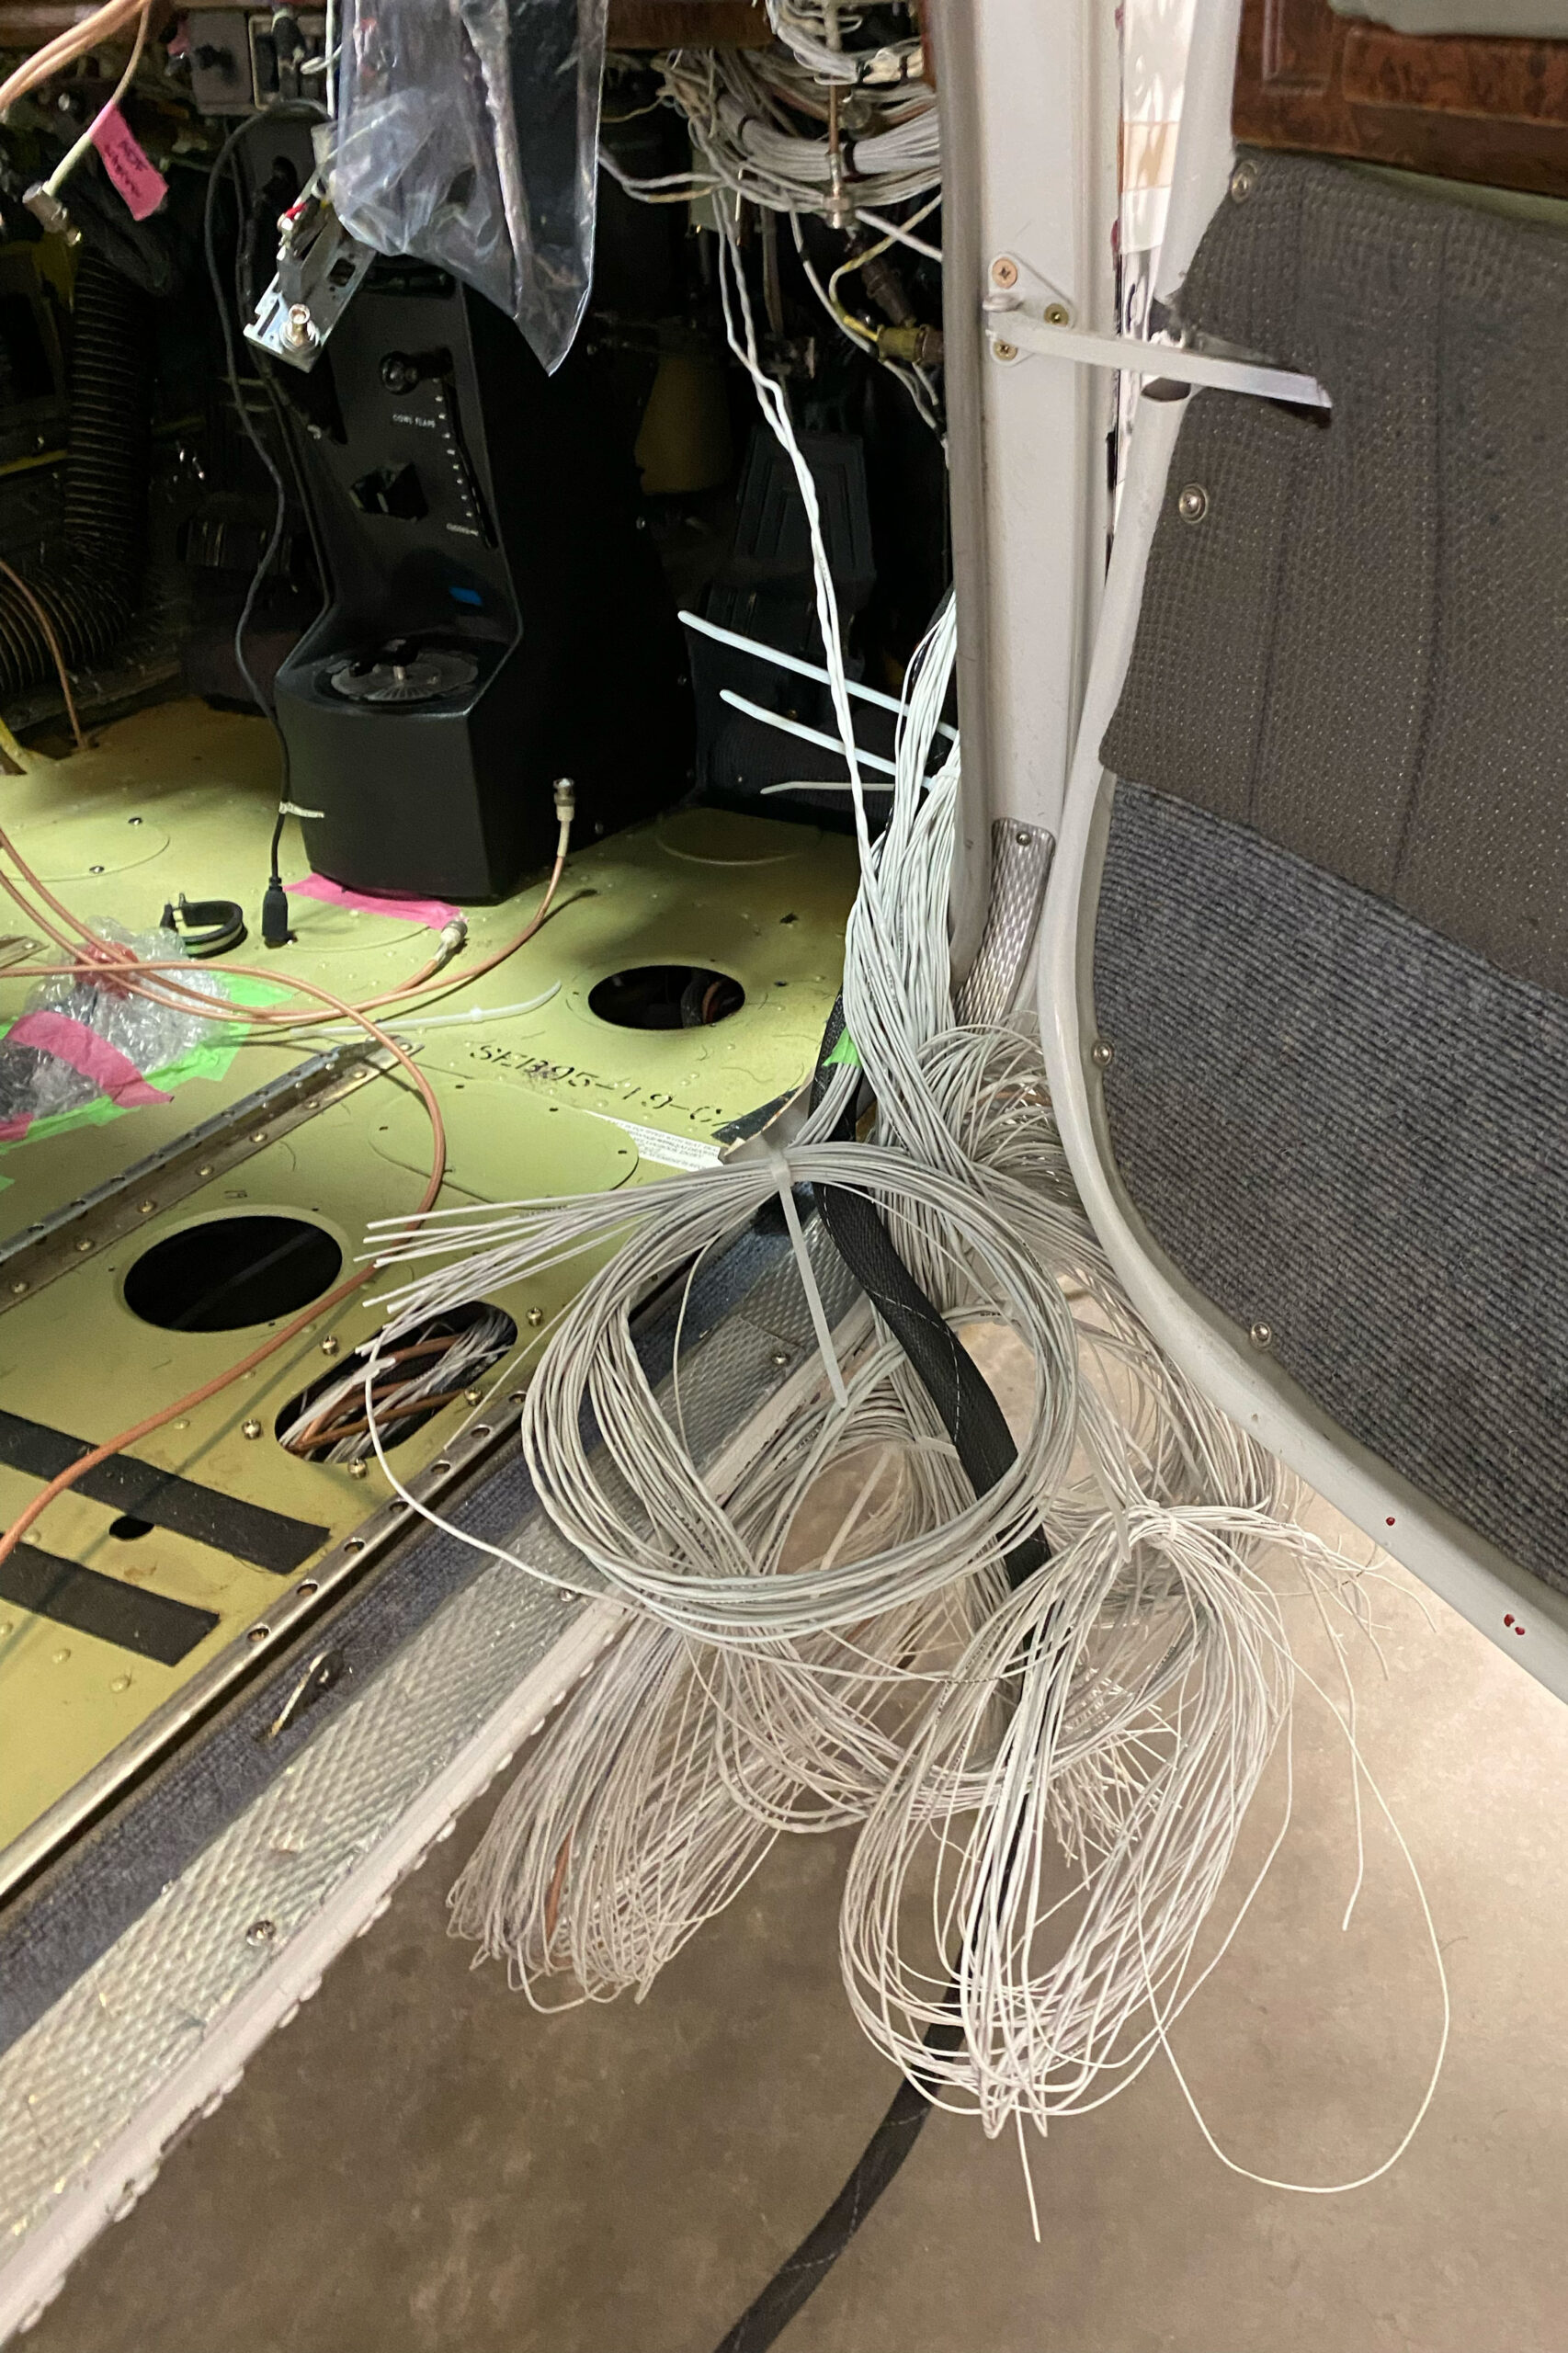
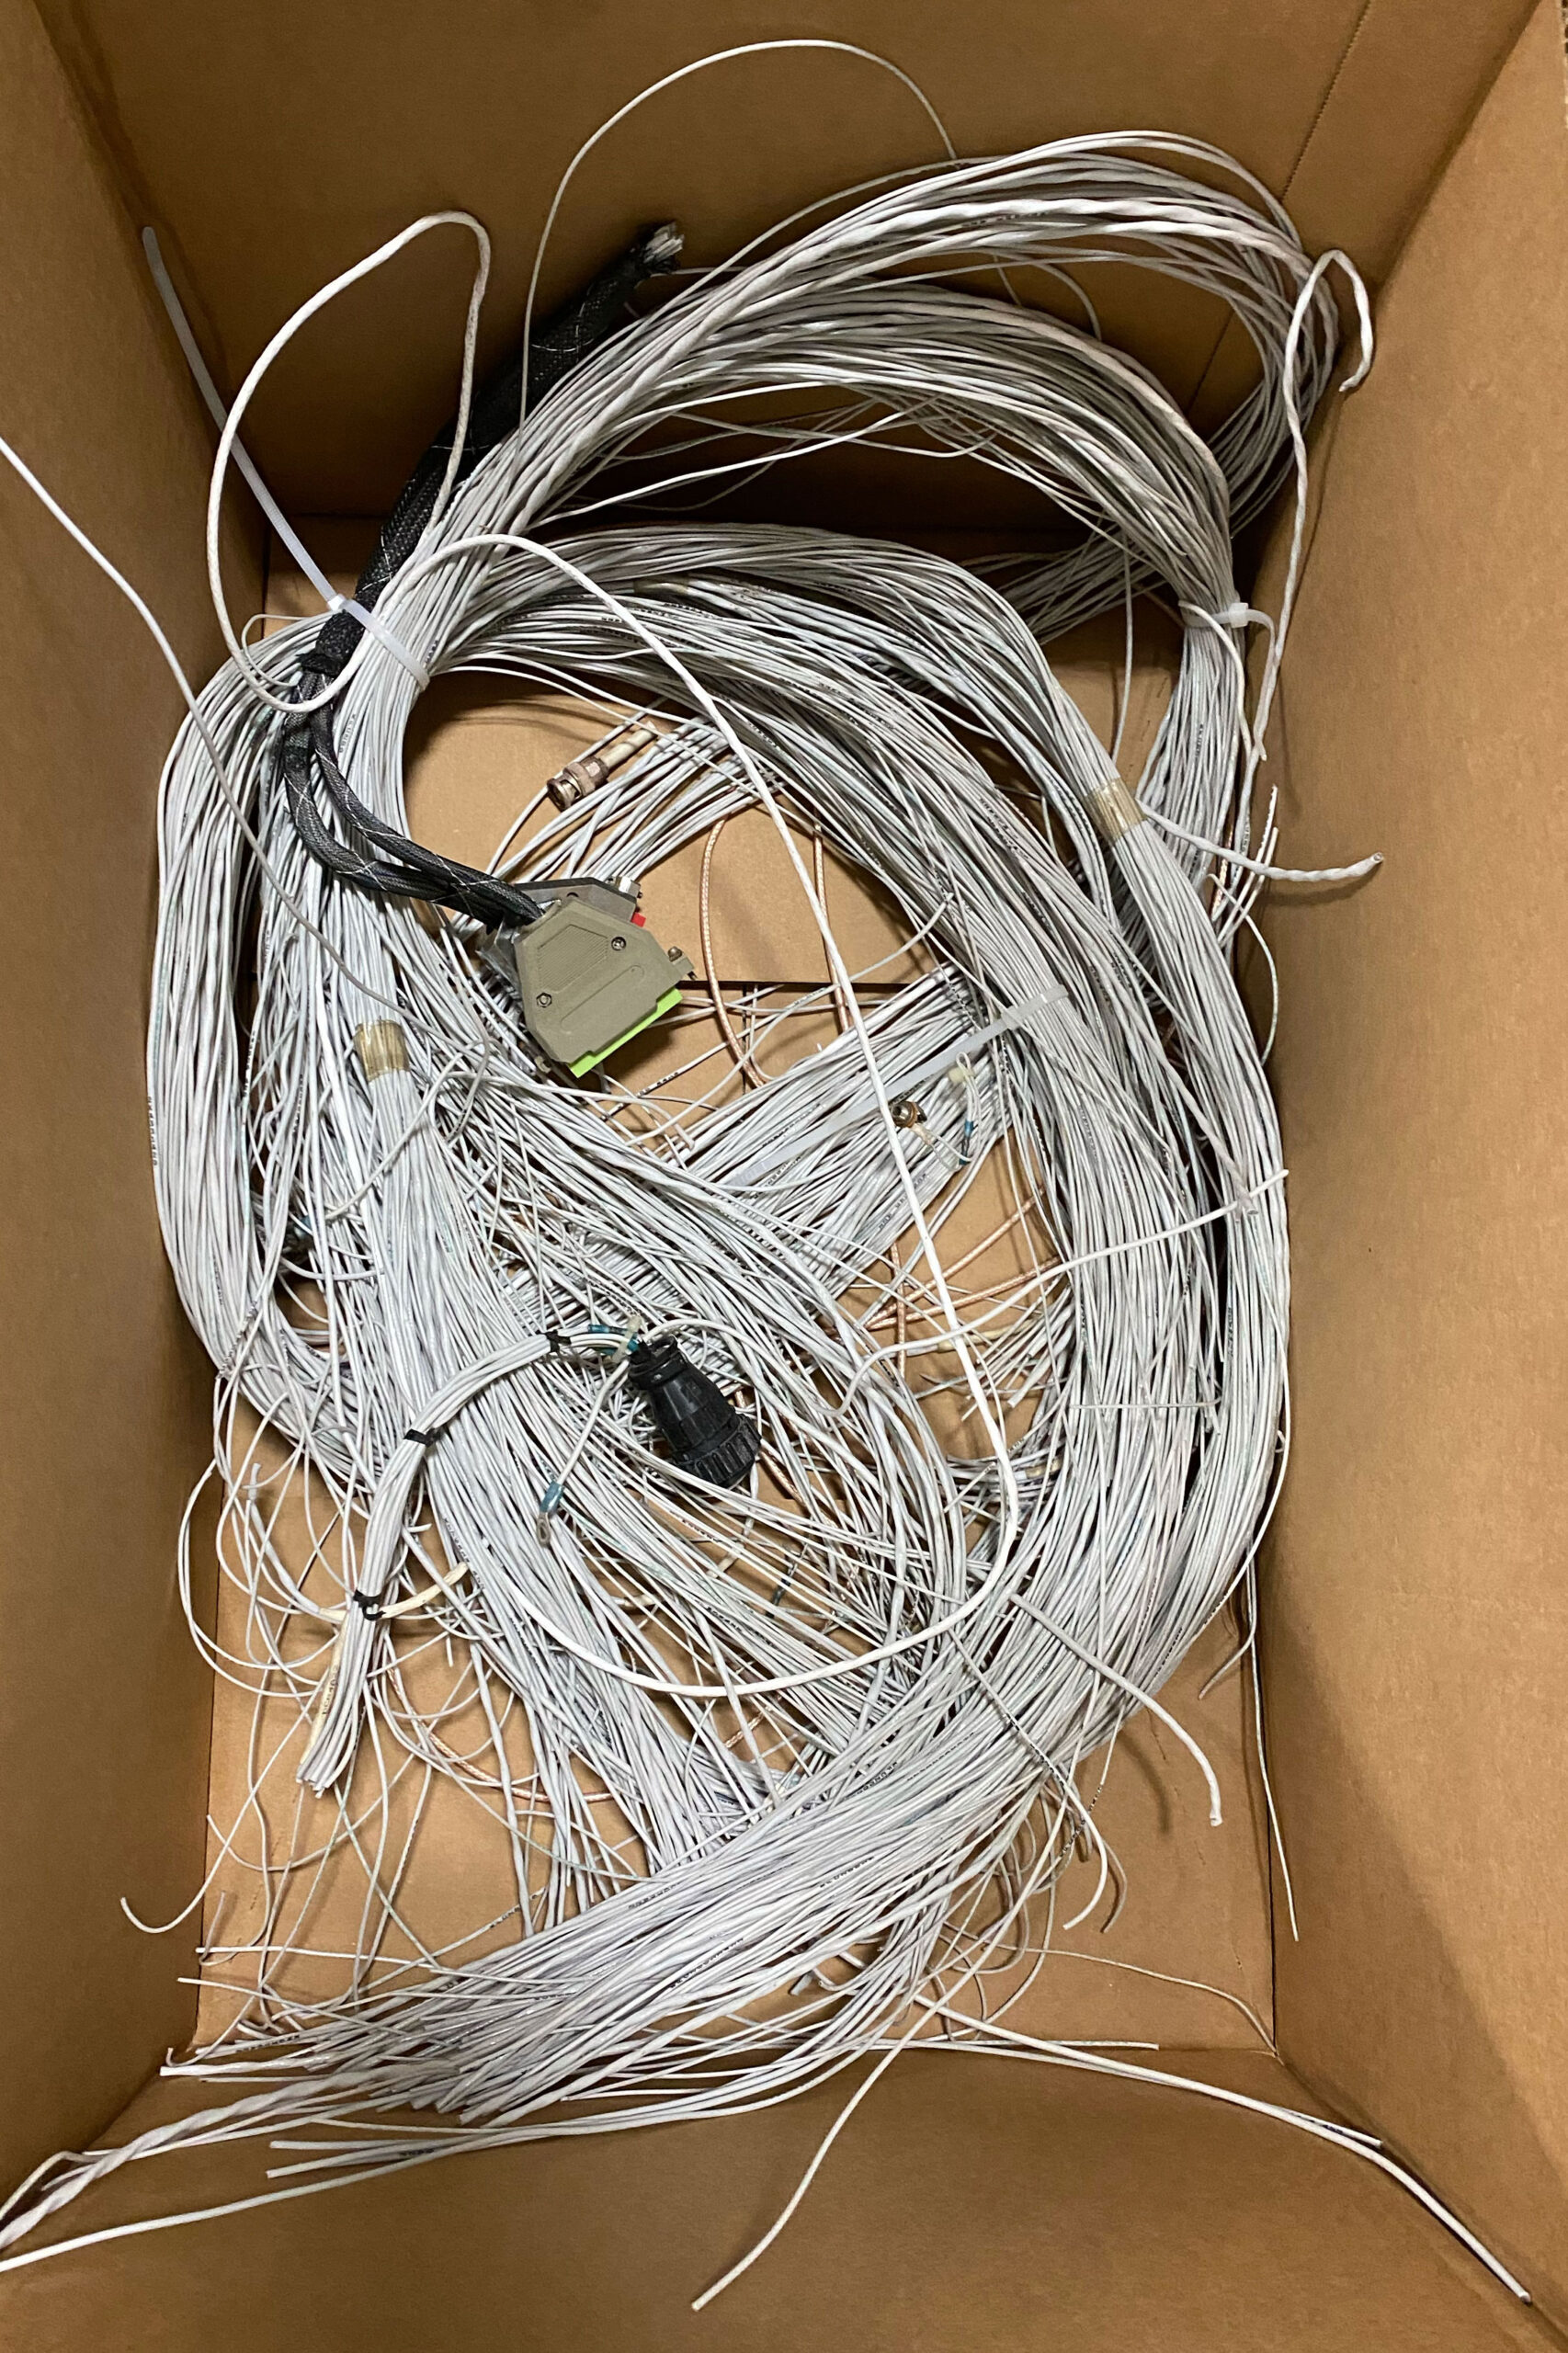
The more large projects we do, the more we realize how complex these older installations were, especially if they had been modified with additional Loran, GPS and VHF navigation systems over the years. To allow all of these navigations systems to drive an autopilot like a KFC 200, banks of switching relays were installed to swap data channels leading to the auto pilot and navigation displays, from one nav or gps source to another. This type of advanced wiring results in nearly a mile of wiring, or 30-40 pounds of wire that is no longer required if going digital!
GFC 500 for the win!
The no-brainer autopilot of choice was Garmin’s GFC 500 digital autopilot. While the KFC 200 was a venerable autopilot of its day, the GFC 500 brings the modern technology features like Electronic Stability and Protection (ESP) that can monitor the attitude of the aircraft and automatically engage the autopilot if the aircraft flies outside of the acceptable flight envelope parameters. This triggers LVL mode, that engages the autopilot and brings the aircraft back into straight and level flight. This feature is a major safety enhancement if a pilot becomes spatially disoriented in IMC, and can allow the proper time for a pilot to regain their bearings.
The GFC 500 autopilot provides additional great features like Altitude Pre-select for climb and capture, as well as IAS and VS airspeed modes for climbs and descents up to or down to a pre-selected altitude. The digital autopilot has complete integration with the onboard navigation systems and digital flight displays to utilize any available digital navigation sources to automatically steer the aircraft on course through an entire flight plan with minimal interaction from the pilot.

G3X, and a touch of future proofing…
With the GDU 460 flight display as our primary flight display (PFD), to be IFR compliant we still needed a backup solution. This can either be 3 analog instruments, or the popular G5 EFIS display. One recent addition to the approved backup list is Garmin’s GI 275 flight instrument. At the time of this posting, Garmin had yet to have support that allowed the GI 275 to be a wired backup to the navigation system, wired to the autopilot and radios, this is something that was on the horizon. We chose the G5 standby display, but installed it on top of a panel cutout for the GI 275 standby instrument as a pathway to a future upgrade and replacement, allowing for improved display appearance and added features once they become available.
The G3X Touch system utilizes several LRUs (line replaceable units) that operate on a CAN bus network. Together they provide all the necessary data for the flight display. This equipment list includes a GSU 25D ADAHRS computer. This module interfaces with the aircraft pitot/static system for airspeed and altitude, and also includes a built-in AHRS sensor to digital attitude sensing that drives the attitude display and synthetic vision capability of the flight display. A GMU 11 magnetometer is installed remotely along with a GTP 59 temperature probe. The GMU provides calibrated magnetic heading, and the GTP provides outside air temperature sensing to the system that allows the G3X to provide calculated winds aloft and true airspeed. Next a GAD 29B/D module acts as a ARINC data interface to the gps/nav/com radios (and some 3rd party autopilots). In this case the GAD 29B interfaced with the GTN 750 navigator.
A single GDU display allows for up to 5 RS-232 interface connections. In this aircraft it required 2 RS-232 interfaces for the GTN 750, 1 RS-232 connection for the GNC 255A, 1 RS-232 for the GTX 345 traffic and remote control interface, and 1 remaining RS-232 interface to the GDL 51R SiriusXM radio and weather receiver. The single display installation left us at a disadvantage as we could have utilized one additional RS-232 interface that would allow the G3X display to remotely control the GMA 345 audio panel. But at the end of the day it was just as easy to raise one’s hand to manipulate the buttons and knobs on the audio panel itself. Most aircraft don’t easily allow for the installation of dual G3X flight displays without major modifications or replacement of the existing panel structure.
Out with the old, in with the new.
Gone are the days of individual radios for COM transceivers, and separate VHF navigation receivers. We don’t see this very often, but this radio stack was packed with individual radios from top to bottom. Two Bendix King audio panels, a dated 2″ GPS navigator, COM1, COM 2, NAV 1, NAV 2, an ADF, and finished off with a modern Garmin GTX 345 at the bottom. In the rear of the aircraft was located a remote DME, a stormscope receiver, and an active traffic system. The storm scope and traffic system were paired to a green screen instrument display on the co-pilot side. These remote modules, combined with that of the KFC 200 autopilot, and remote gyro for the KI 525 HSI system left no shortage of avionics spaghetti wiring for our team to sort through.
The easiest of jobs are those where you can strip everything out of an aircraft, and start fresh. While this job allowed us to remove most of the original equipment, we still had to retain wiring interfaces for the active traffic system that we planned to interface with the existing GTX 345 since it was compatible. The KI 256 attitude indicator with flight director, the KI 525 HSI, slaving accessory, flux valve, and remote gyro compass were all able to be removed with the associated wiring from the old radios, along with the interfaces to numerous relays and ultimately the KFC 200 autopilot flight computer and accessories being removed.
Once the spaghetti mess was removed, it was time to get down to the good stuff — planning the execution and installation of brand new equipment. Some customers aren’t always the most decisive when it comes to deciding on the equipment they want. This customer and I went through a variety of quotes and estimated configurations before we ended up with the final config. Rather than going with Garmin’s flagship TXi Flight Display system, we settled on the similar G3X Touch flight display for a lower total cost, while still retaining excellent features. In some areas the G3X has even greater features with options like remote radio frequency tuning, and the ability to integrate with GDL 5X series ADS-B and XM receivers at a much lower cost than what the TXi and GTN display require for the same ADS-B and XM reception capability.
Speaking of the panel…
The original concept of this project was to install modern looking “Cessna grey” aluminum panel overlays over the top of the remaining instrument structure as a replacement for the 1980s molded plastic. Even the plastic “wood grain” sub panel was aged, fragile and breaking off into pieces. It too had to go. Not every upgrade project has a budget to support the replacement or addition of a sub panel overlay as well, but this customer wanted everything to look new and modern.
We were fortunate enough to have an airplane with existing panel structure tall enough that it only required a little bit of modification of the upper edge of the instrument cutout so that it could accept the height of a G3X GDU 10 inch display. Many older Cessnas simply don’t have enough height in the existing structure to allow for a full size G3X display to fit. This is an area where the TXi flight displays fit into more places, as they are wider, but shorter in height. If that’s not an option due to cost, or fit, the 7″ G3X GDU 470 portrait display is a fantastic alternative, as it can fit in the space to the left of the control yoke, and still provide a great amount of usability and features.
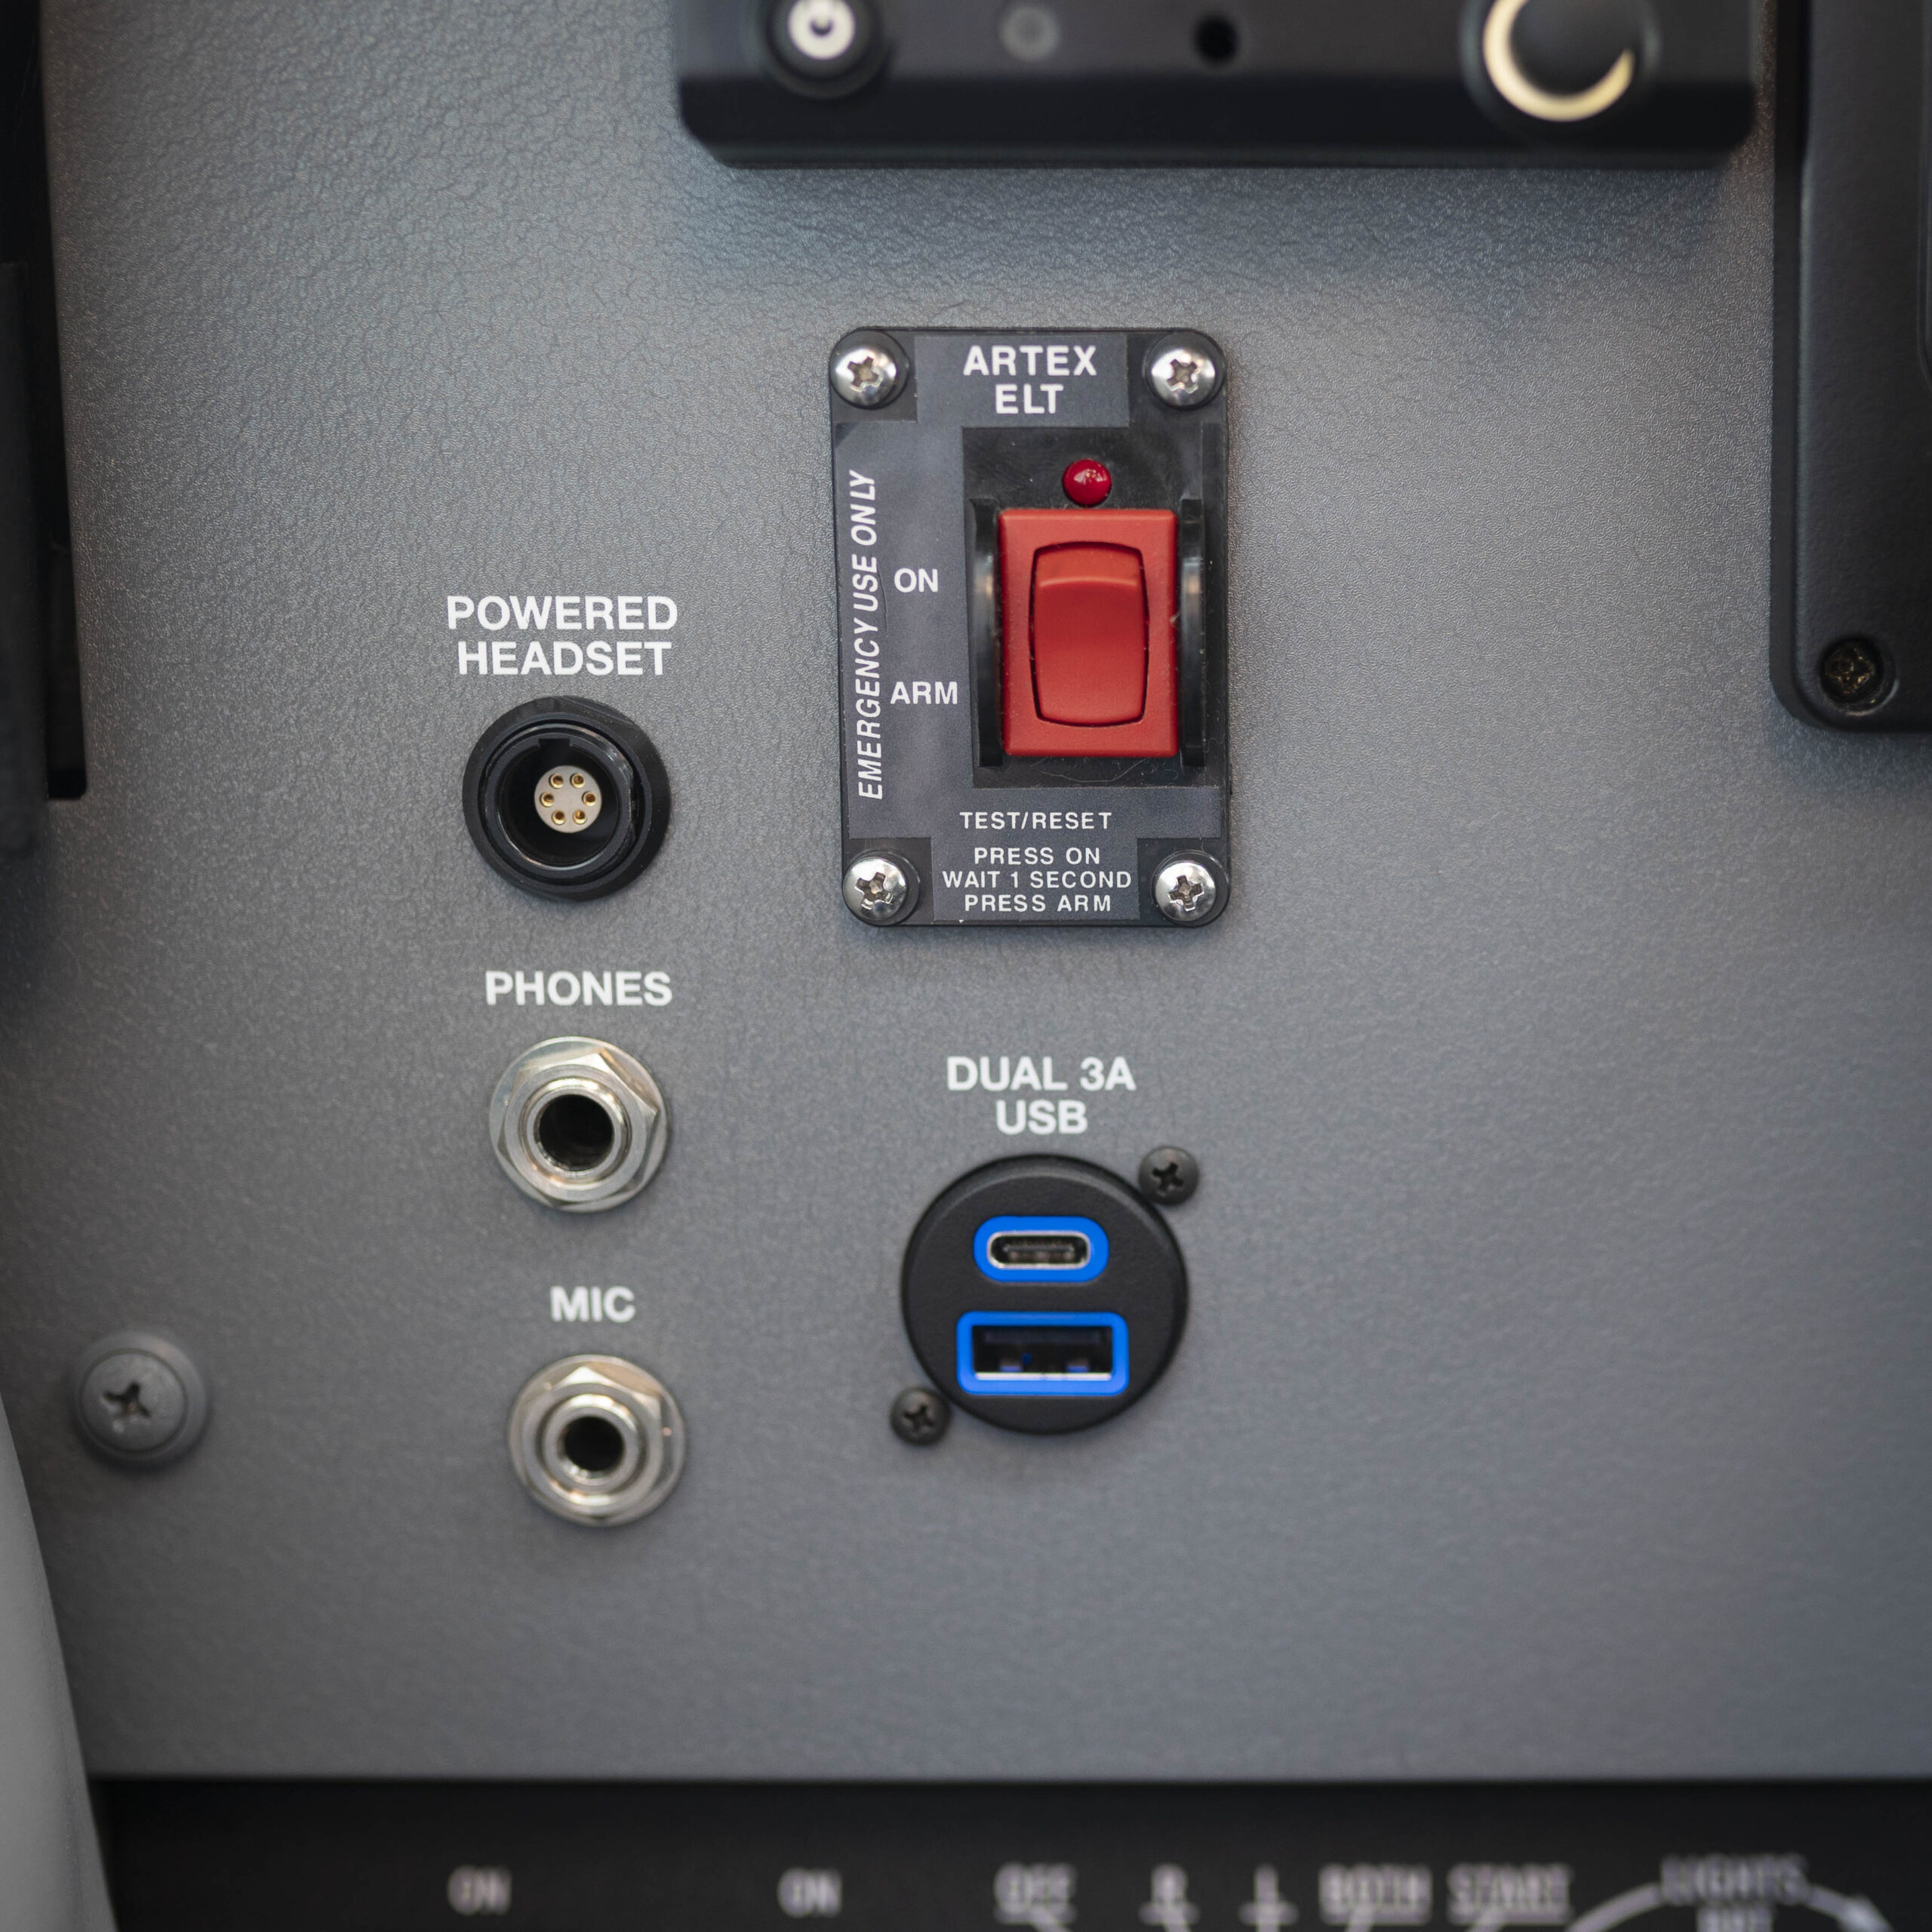
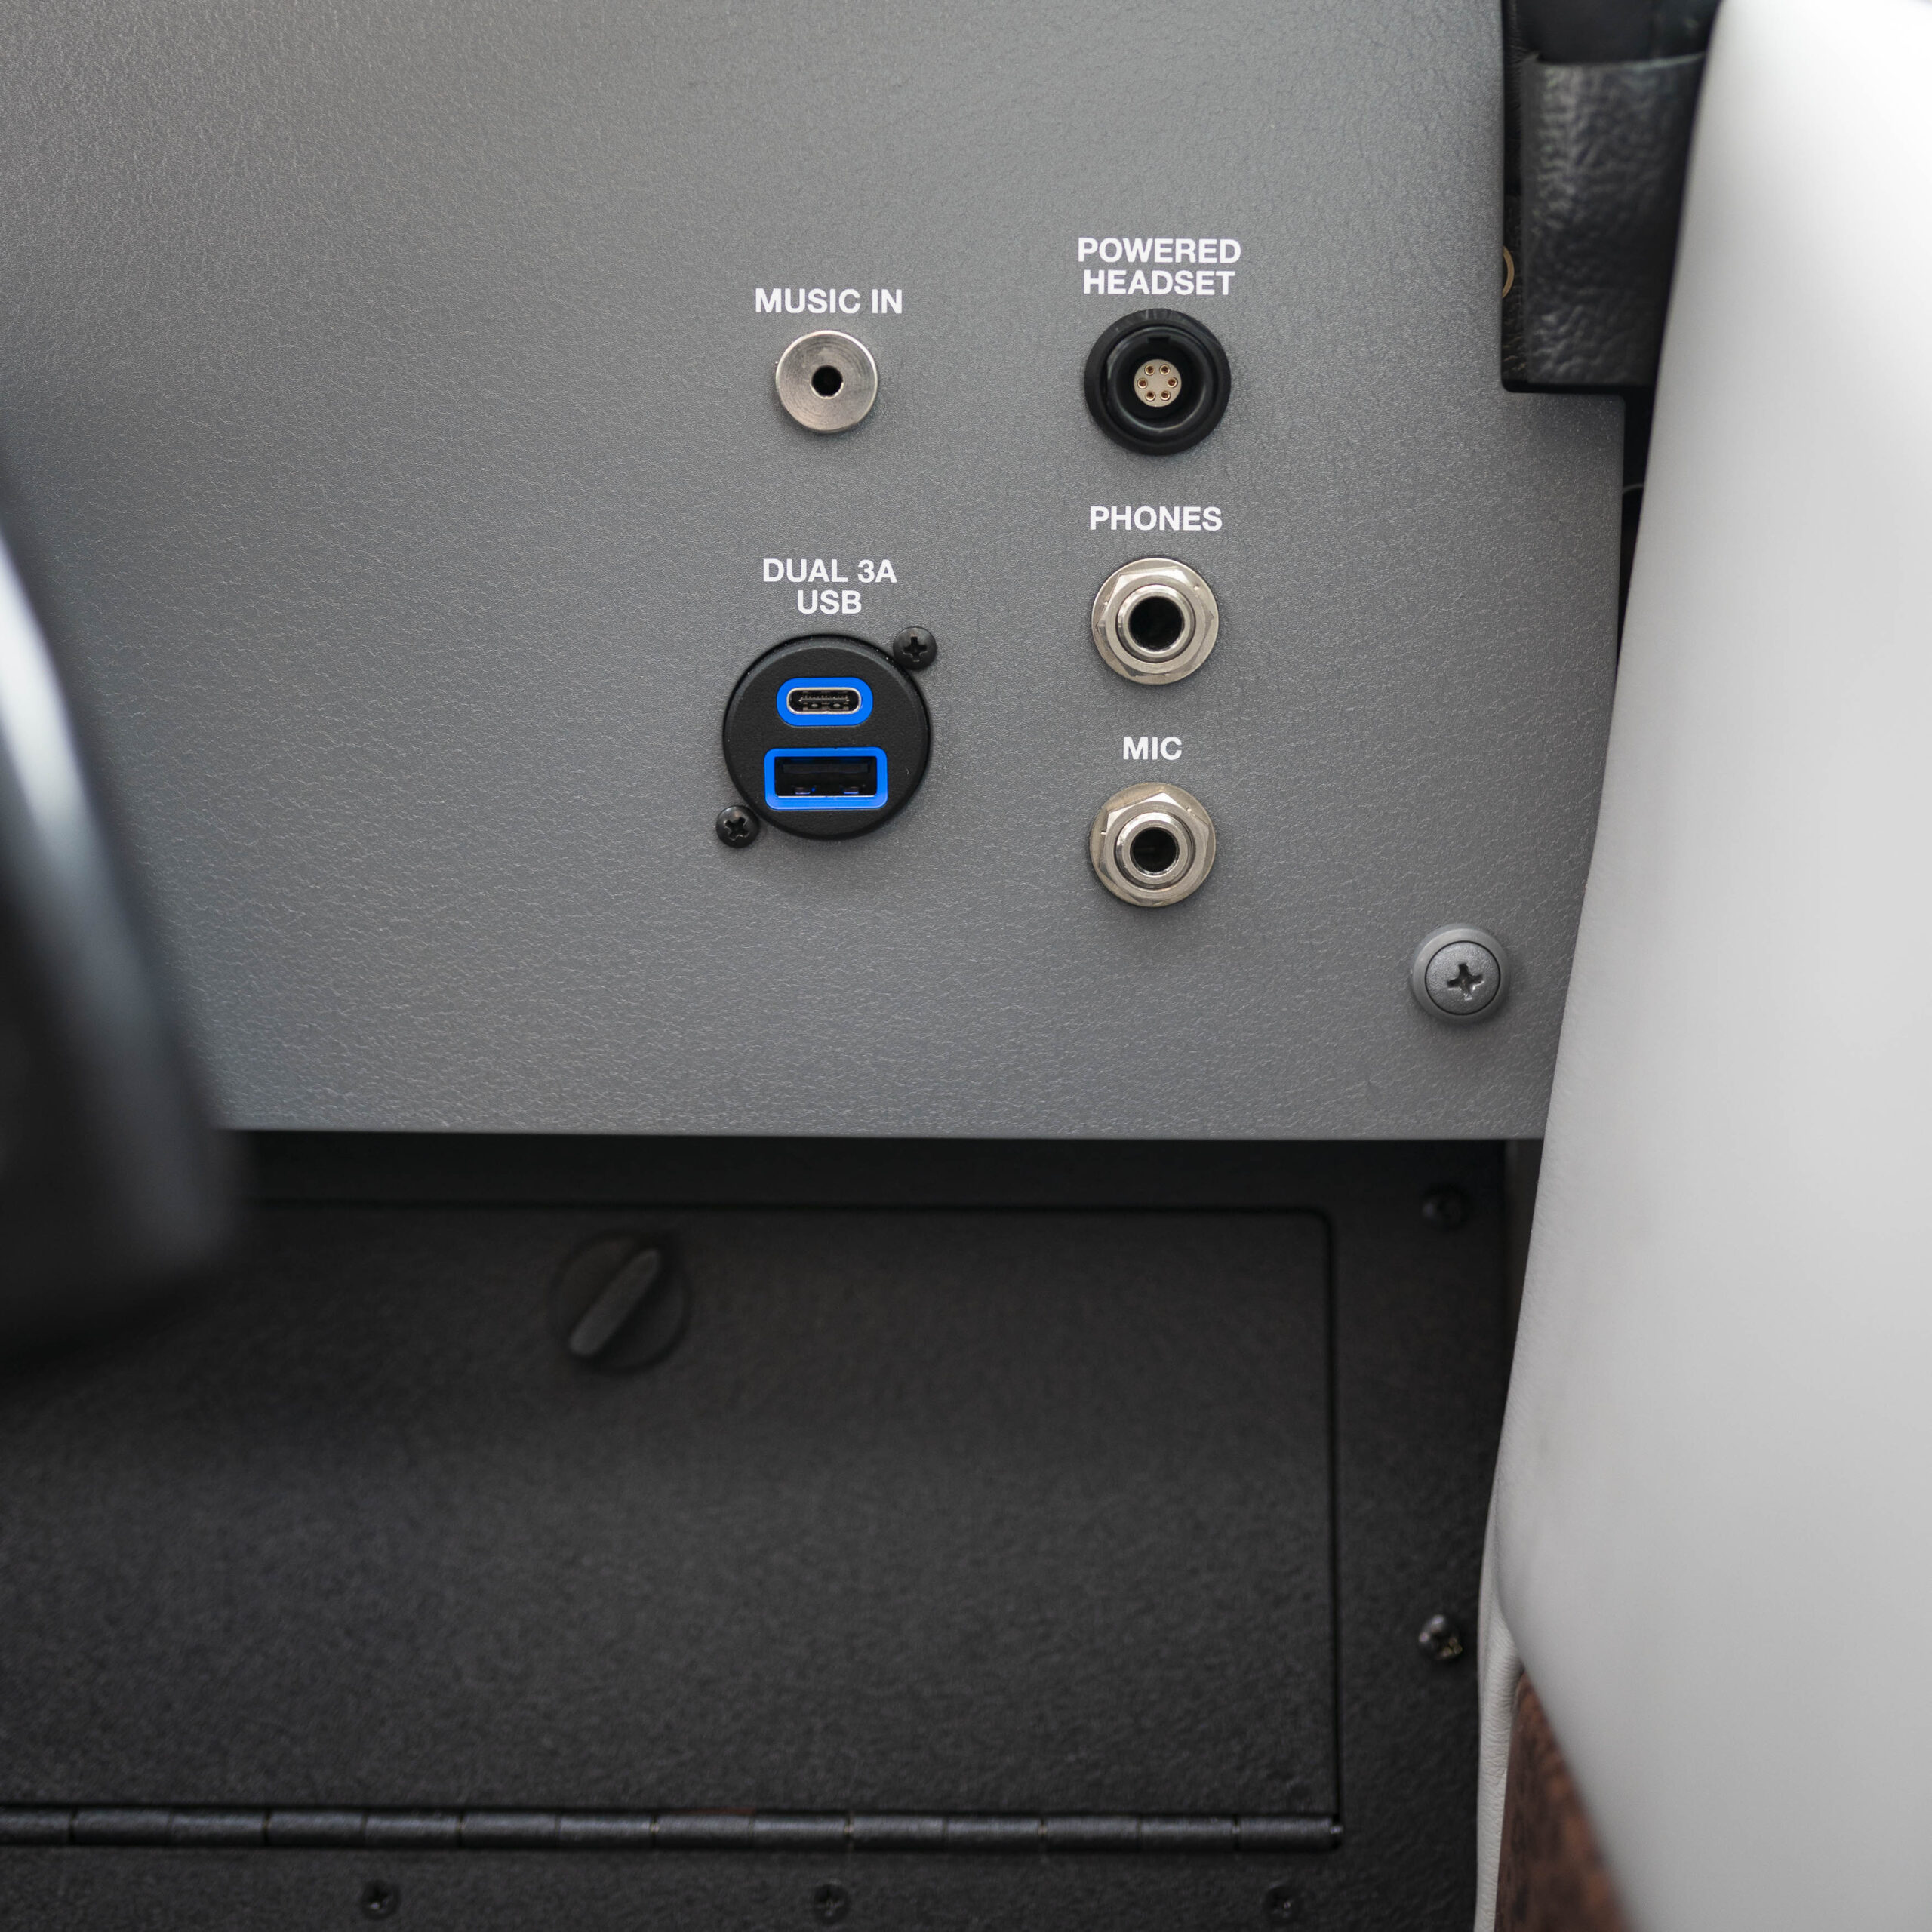
With the removal of all of the original analog engine instrumentation, the co-pilot side instrument panel became a very basic design, that included Garmin GSB 15 USB ports with one USB-A, and one USB-C port at 3A each, along with standard headset jacks, modern Bose/Lemo powered headset jacks for noise cancelling headsets and a 3.5mm music input jack. This layout mirrored the USB port and headset jacks positioned on the pilot’s instrument panel. The pilot panel also included the GDU 460 display, G5 Standby instrument (over a GI 275 cutout), and the ELT remote.
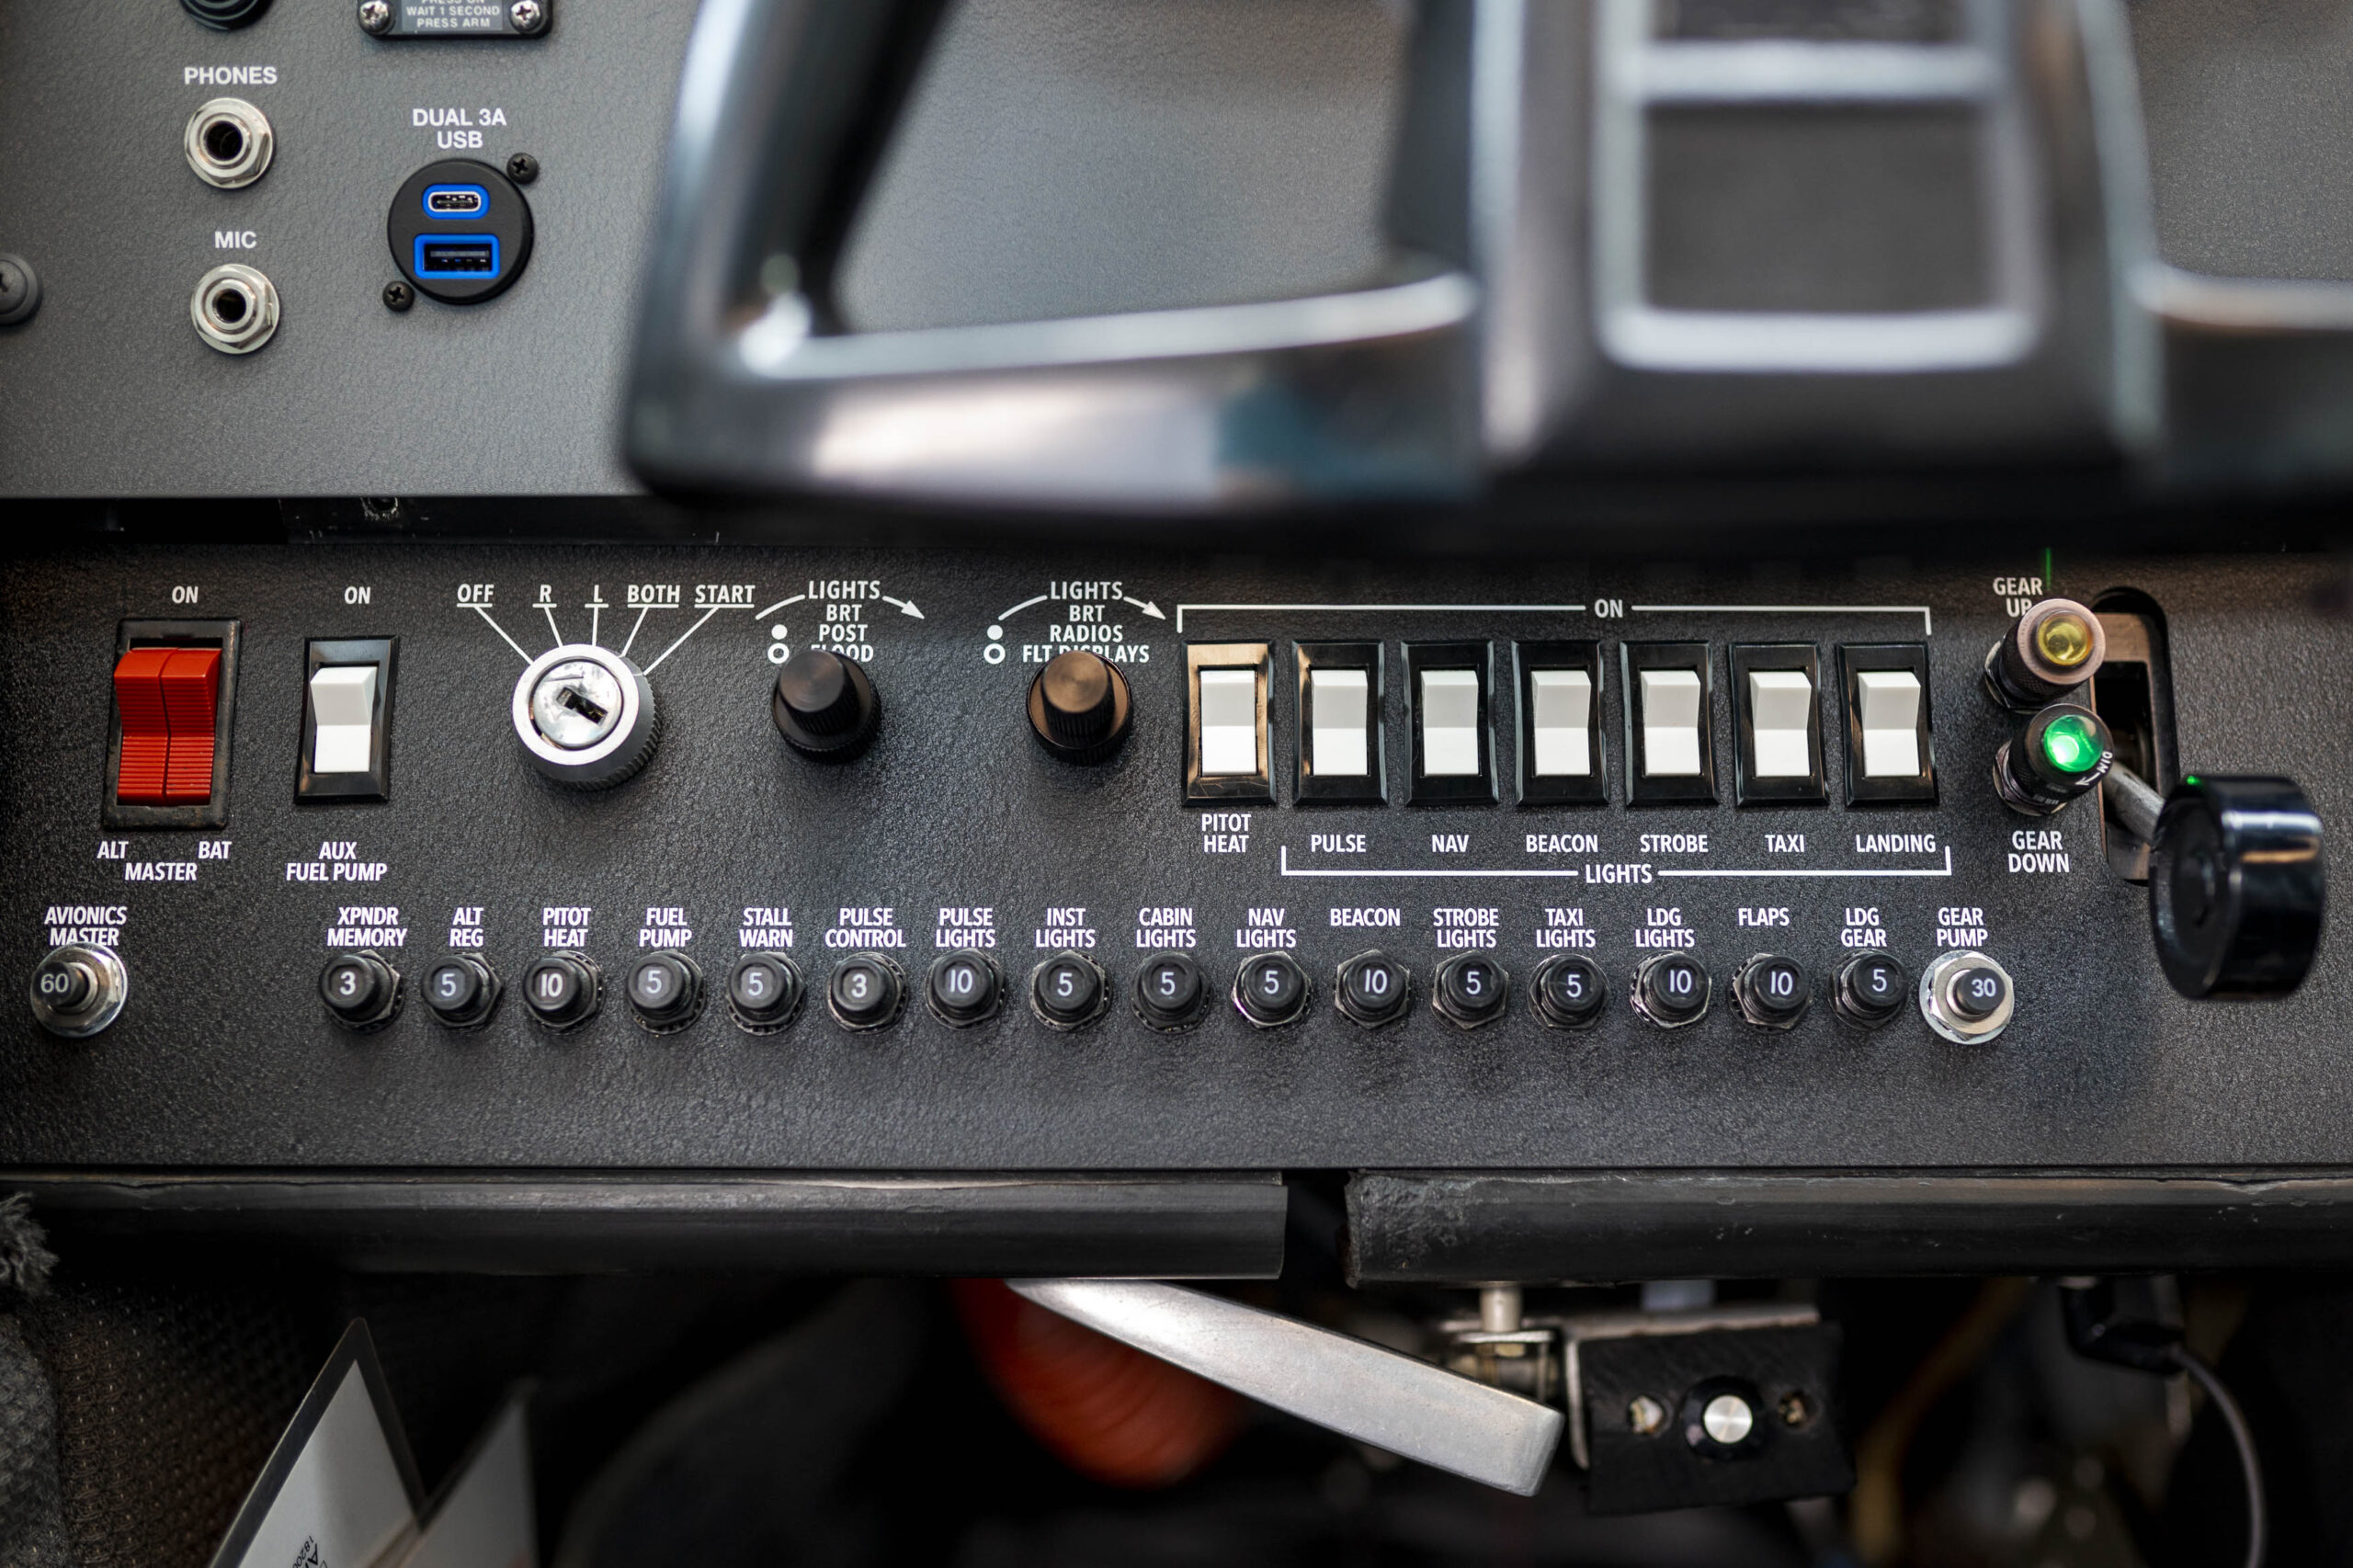
The custom designed aluminum sub-panel contained an all-new set of modern push-pull breakers, and saw the replacement of the original rheostat lighting dimmers with STC’d Pulse Width Modulation (PWM) dual dimmer assemblies from Max Dim providing all new smooth lighting control for the radios, flight displays, eyebrow lights, and overhead lighting. Facilitating the installation of a new sub-panel overlay also requires the removal and re-installation of the engine and environmental controls which can add additional labor to any project.
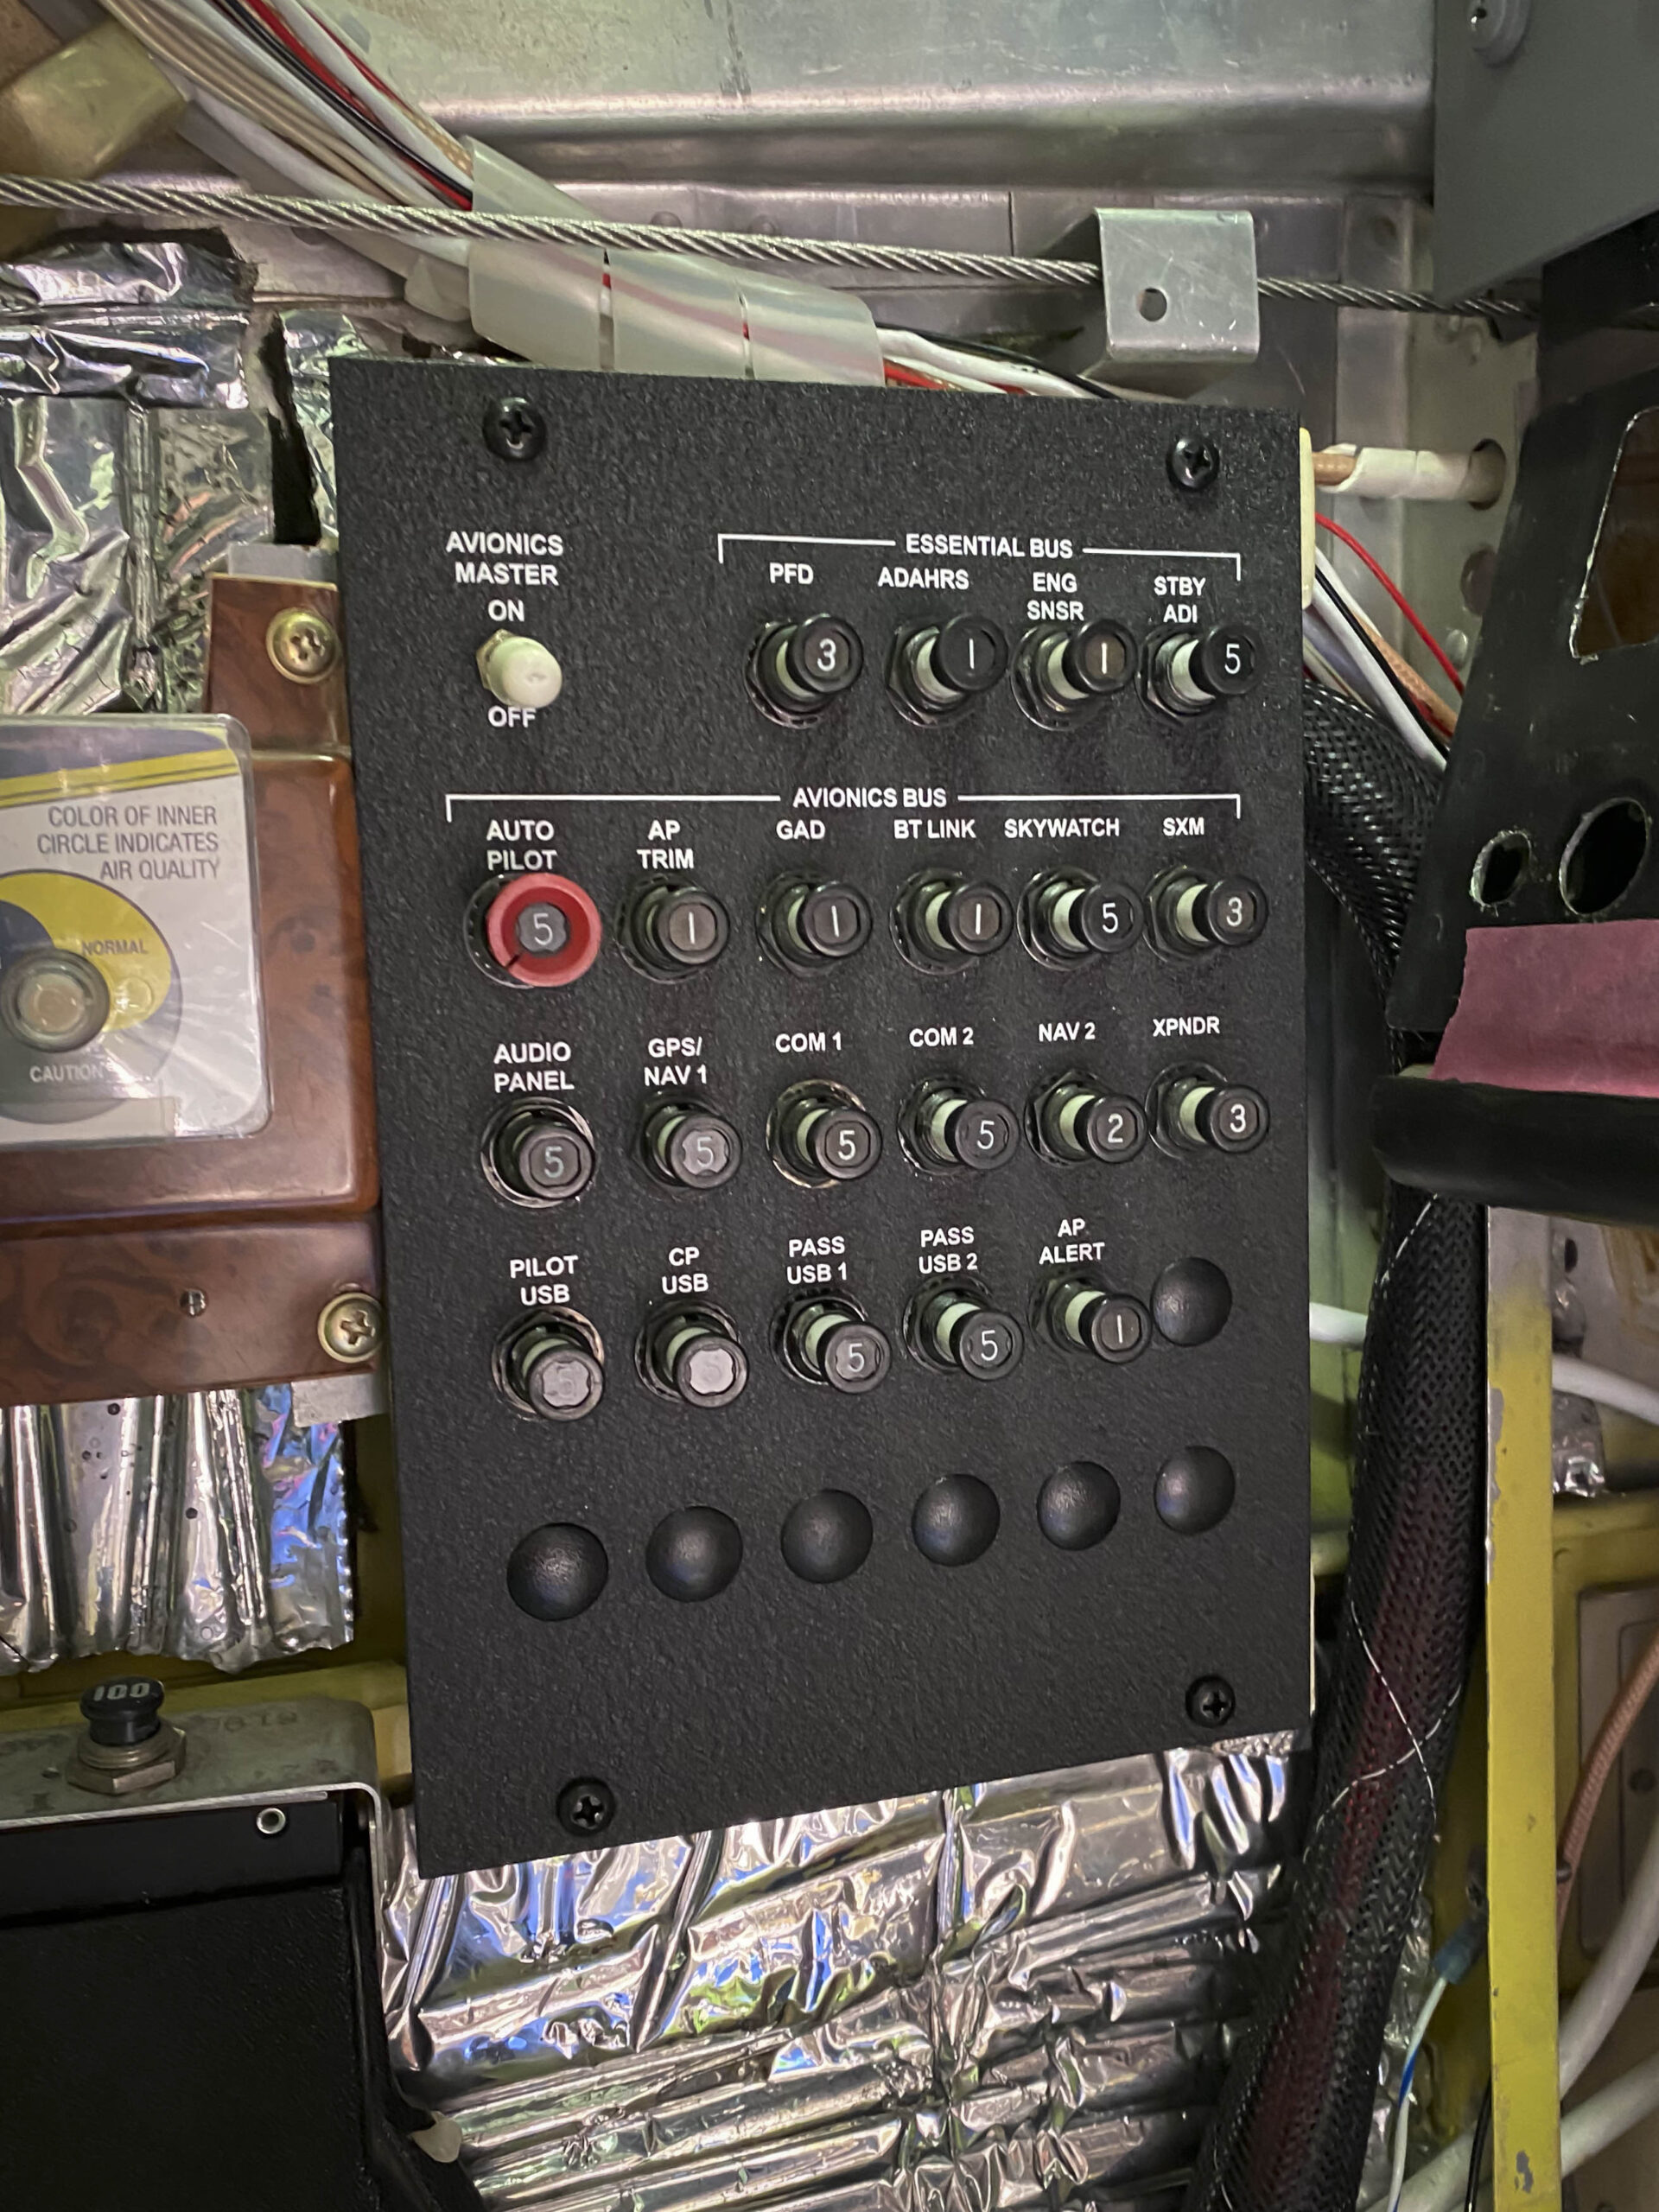
Finishing off the new panel structures, the side wall mounted breaker panel was also replaced with a new crinkle black powder coated aluminum breaker panel with a new layout and new labels. In the passenger arm rests for the backseats, additional USB-A/USB-C GSB 15 ports were installed on each side along with new stereo headset and mic jacks.
That’s not all!
I could continue to explain the numerous additional tasks that went into accomplishing this massive avionics retrofit, from the design and planning, to the complete execution. But instead I’ll just leave you with the list of the parts and systems that made it possible. Perhaps this will give you ideas for your dream upgrade. Do you want to talk about an estimate and ideas for your aircraft? Click here and fill out the form at the bottom of this page and we can start the discussion.

CiES Magneto Resistive Fuel Senders
As CiES describes it, “MEASURING FUEL IN A WAY THAT IS – Simple, Accurate & Reliable.” Unlike original resistive type fuel floats that work like a variable resistor as the float moves up and down, CiES Digital fuel floats are a patented design that utilizes a magnet at the pivot point of the free-swinging float arm. This magnetic interaction can be thought of like a compass and its needle pointing to magnetic north. Fuel levels can be measured accurately to less than 0.03 of an inch. This measurement represents much less than 10ths of a gallon of AVGAS or Jet A. We drain the tanks completely and calibrate in set intervals from empty to full. The days of only being accurate when empty are over!
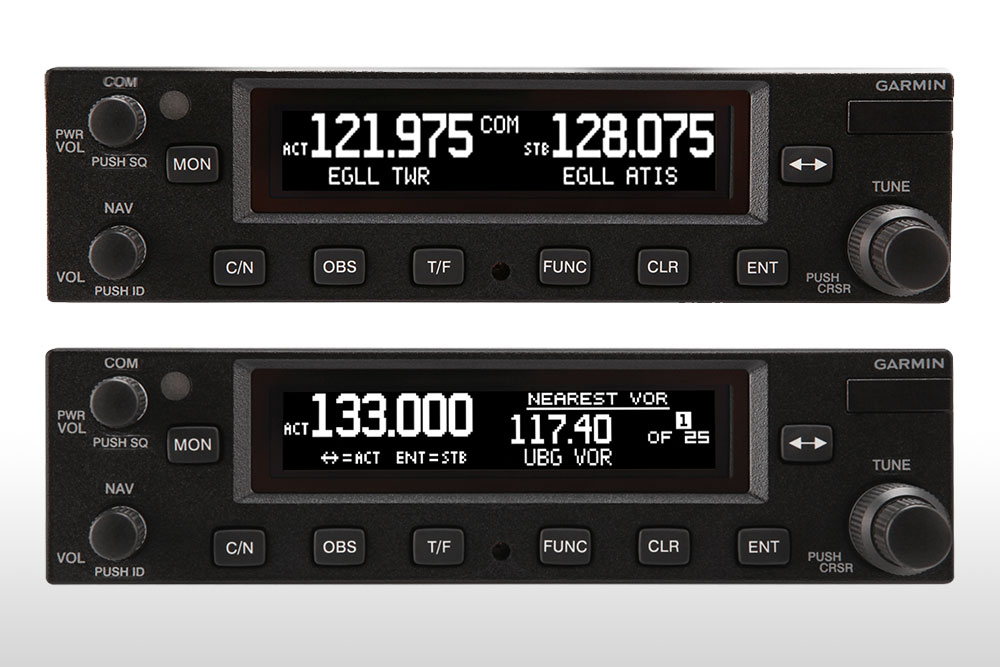
Garmin GNC 255 VHF NAV/COM Receiver
While it may not look as beautiful as its newer touch screen siblings, the GNC 255A is the modern VHF NAV/COM transceiver solution for replacing aging Bendix King KX 155/165(A), Apollo or Garmin SL30s, and similar nav/com units from the past. Its low profile height makes it easy to install in existing radio stacks with limited space. Each Garmin COM comes with a 10W transmitter standard, and standby monitoring functionality allowing you to listen to two separate radio frequencies at once. With a built-in glideslope receiver, this is the least expensive offering from Garmin to fly ILS precision approaches short of purchasing a GTN 650 Xi or 750 Xi Navigator. This is the essential pairing along side a standalone WAAS GPS receiver. When interfaced to a GPS or compatible flight display, the GNC 255 will use GPS position along with an internal radio frequency database to provide station IDs for frequencies in the active and standby positions. Example: KOSH TWR, KOSH ATIS.
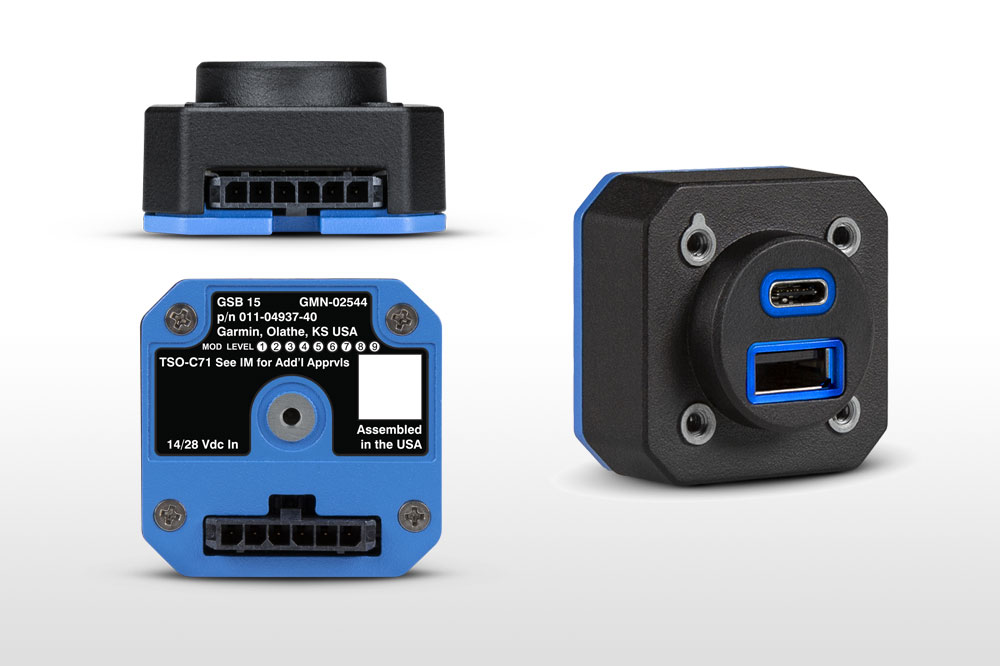
Garmin GSB 15 Dual USB ports
Garmin’s GSB 15 product line provides high powered, 3A-per-port USB ports in 3 different models. The original dual USB-A, and the newer USB-A + USB-C, and Dual USB-C models. Both of which are dimmable, while the original model has the option of backlighting off, or enabled with a fixed dim glow. The size of the GSB 15s, and their machined aluminum construction make them one of the best TSO’d USB products in the certified market. The GSBs are powerful enough to charge a full sized tablet and a power-hungry smart phone, when other USB ports on the market struggle to charge a tablet in flight. The GSBs also provide a data interface when paired with Garmin’s GI 275 flight displays, providing a means for downloading log files, loading navigation databases, and dealer loaded firmware updates.
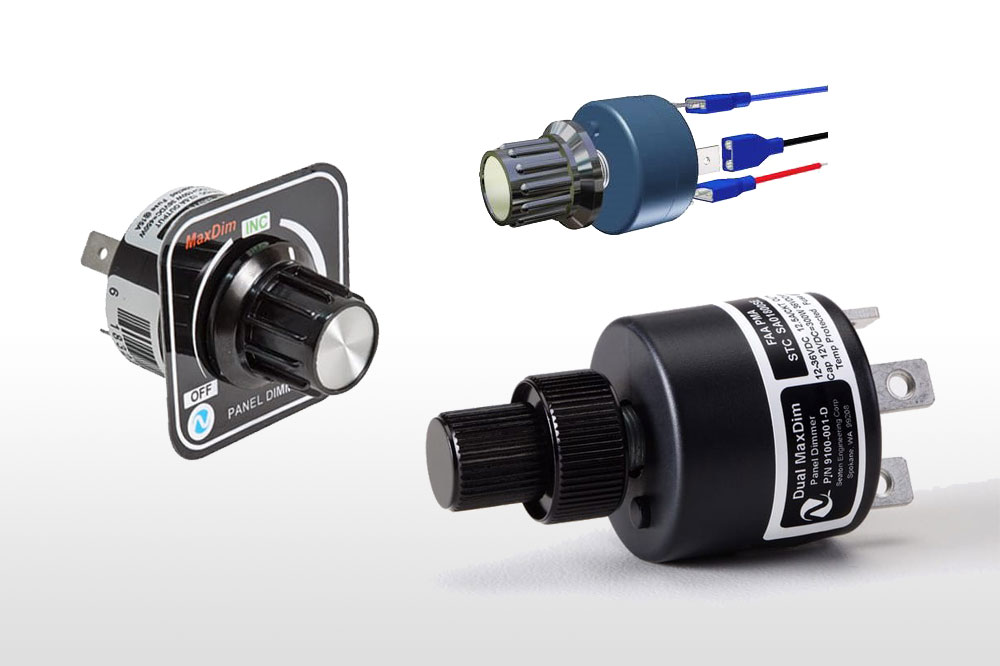
Maxdim PWM Dimmer Controller
Ditch the old rheostats… The days of variable resistors are over with pulse width modulation technology. Pulse Width Modulation, or PWM for short, is a method of reducing the average power delivered by an electrical signal, by effectively chopping it up into discrete parts. The average value of voltage (and current) fed to the load (lights) is controlled by turning the switch between supply and load on and off at an extremely fast rate. The longer the switch is on compared to the off periods, the higher the total power supplied to the load. PWM technology eliminates the power absorbing previously required with traditional rheostats of the past, to efficiently control incandescent and LED lighting in modern installations. Having problems getting smooth transition in your lighting? Consider switching to an approved PWM dimming solution.


